How to make great photo's on a budget #401

March 27, 2026  •  Leave a Comment

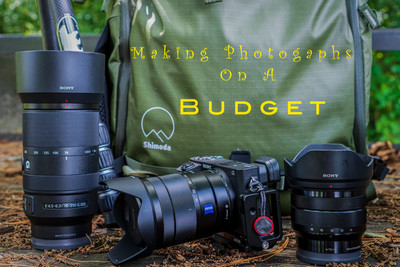
Hey Ya'll! How's it going? Spring is in the air and a great time for photography. This week's blog is how to take great photo's on a budget. If I were buying a mirrorless interchangeable camera as my first camera. Now I have done blogs on what I think a first camera should be a good point and shoot like my trusty Canon G7XII. Here is a link to that blog First Camera. There are 3 key factors to taking great photo's. First and most important is Your Photography Skills. Second of importance is the Lens. And the least important is the Camera Body. Let's talk about them. In this blog I will reference Sony brand camera's but all camera brands will have similar products at similar prices new and used. 

Photography Skills- These skills are the Most important and something that is learned over time and you don't need a fancy camera to learn them. You can learn them with a phone or a point and shoot camera like mentioned above. These are things like composition, framing and creating an artistic eye. Seeing like a photographer. These are learned things except maybe the artistic eye some folks just have that but composition and framing come with shooting . There is also some technical aspects like the exposure triangle to learn and use. Learning about aperture , shutter speed and ISO and how they affect the photo. And then there is editing. That is as much as important as the taking of the photo itself. Even back in the film days this was important. Ansel Adams was an expert film developer and printer back in the day creating new techniques and processes to get the image he wanted. These are things that you can start right now learning. There are tutorials that can be seen online and workshops that you can attend to help you with this part of the process. It doesn't matter how good of a camera kit you have if you don't have the photography basics and editing basics you'll still have poor photographs. This learning process will last the rest of your life. I'm still learning new stuff every day.

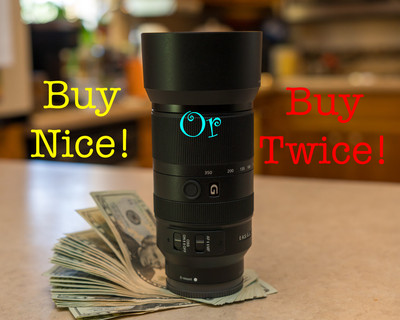
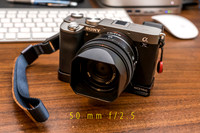
Camera Lens- This is the most important thing you can Buy to improve your photography. This is what you and your camera see through to capture the image you want. You don't need to spend a ton to get a good quality lens although you certainly can. When you're first deciding on your first kit you have to decide on what sensor size you want.  Full Frame or APSC sensor size. Here is a blog I wrote on APSC sensor types. APSC Sensor Cameras And Here's one o Full Frame Sensor. Full Frame Sensor Camera's.  No matter what type of sensor size camera you choose here are a few tips on getting a good lens on a budget. First you need to know what you're going to shoot. If you are going to shoot portraits or things in low light a wide aperture lens will be preferred. With Prime lenses you can get wide apertures like f/2.8, f/1.8 or even f/1.4 or wider much cheaper than a Zoom lens with a similar wide aperture. Another way to save money is by buying used. Here is a blog I wrote on buying used Buying New or Used. Third party lenses like Sigma, Viltrox, and Tamron are good choices for lenses for folks on a budgets. Just keep in mind that most camera companies put restrictions on third party lenses like maybe shutter burst rates. This may be important if you are a sports or wildlife photographer. If you are a Landscape or travel photographer another option is to get lenses with a f/4 AMT2016-sony-a6300-review-0423-2AMT2016-sony-a6300-review-0423-2Photographer: Anthony Thurston maximum apertures where a very wide aperture is not needed. These lenses will be smaller and cheaper. Thats what I use on my Sony camera's. All camera companies have their top of the line lenses. Sony's is the "G Master" lens. I only have one of these lenses a 100-400. I bought it used and an older version than the most current version. But it is great quality. Research is the key. Reading blogs, reviews, watching youtube videos and talking to other photographers will help you decide on what you need and the best way to acquire them.

Camera Bodies, No matter what you see on the internet or advertisements the camera body is the Least important item in the three things I mentioned above. I use a camera body that came out in 2018 (Sony A7III) and it gives me great photo's. The only time I would recommend getting the newest body is if you are a full time Wildlife Photographer or Sports Photographer. Everyone else an older used camera will work great. The camera companies make it sound like you can't live without all of the fancy features that they offer but really you don't need all of that to get great photo's. Just about all of the photo's on my website were taken with a APSC 24 mega pixel camera or my phone. I still shoot a 24 mega pixel camera now. For my type of photography I don't need the latest and greatest. The camera body I use now can be had for 900 bucks used. Compared to a 2500 dollar newer version Sony A7V.  Things to consider when getting your camera body. Of course APSC or Full Frame but also battery life and type is important. Anything 24 mega pixel or larger will work. In body camera stabilization is great to have. If buying used shutter count is like the odometer reading on your car. Lower is better. If buying used buy from a quality dealer they will have the shutter count on the camera. Again Research is the key and go to fellow photographers they will love to talk about their camera's and will usually let you shoot them and handle them.

Taking great photos can be done on a budget but remember it's just not the camera or lens it's your photography skills that will make a great photograph. Camera brand doesn't matter even though every Nikon owner will say theirs is the best and Canon will do the same but they all know Sony is the best. LOL Just kidding . Any brand made in the last decade will produce great photo's. I chose Sony because they were the first company to really adopt the mirrorless camera's and I switched from Nikon to Sony and have been with Sony ever since .  In my camera club I one of just a few that shoot Sony.  Remember research is the key! Until next week . Get out and Shoot!

Hey if you want to check out my photography go to my instagram account Max Stansell Photography there are over 2000 posts there. Here is the link

 Max Stansell Photography Instagram Link


One Focal Length Challenge #400

March 20, 2026  •  Leave a Comment

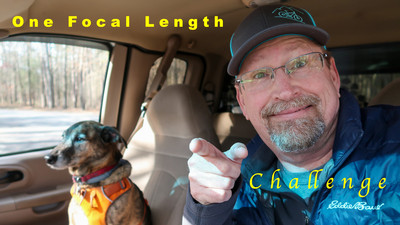
Hey Ya'll! I just wanted to say this is my 400th blog! Whoop! Whoop! Who would have thought that I would have so much to say? Let's see 400 divided by 52 equals 7.6. Over 7 and a half years of doing a once a week blog. Whew! How's everyone doing? Me? Not too bad. But I've been in a photography slump. I have been working on the MAV (Max's Adventure Van) so much that my photography has taken a hit. Also the weather has not been too good for photography either. But spring is in the air and I want to get out and shoot but I need to do something to kick start my photography mojo. I think once I get started I'll be okay.  Now I have been in slumps in the past and sometimes just getting a new piece of gear will knock you out of that slump. But I'm pretty set on gear. Sometimes just changing genres of photography does the trick. Maybe trying a new and different technique to get those juices flowing again. This week I want to share a technique that has helped me in the past and helped me see more photography minded. Shooting with one focal length. Some may call it a one lens challenge but lots of people all they have are zoom lenses and if you just restrict to one lens you could have a focal length of 24-120mm which isn't much of a challenge because you have so many focal lengths to shoot from. So if you only have zooms you can use a piece of gaffers tape and tape your lens to one specific focal length. Say 35 or 50 and leave it there all day. For me I like using primes for this exercise and put a 35, 50 or even a 85 and only use it for a day. This exercise will get you more into seeing the scene. You will have to use your feet to zoom in and out and framing will become easier as the day goes on.  Usually with zooms we tend to shoot at the long end or the short end and not much in the middle. But if you restrict yourself to one focal length it makes you see things differently. 

How do I do this? I usually take a photowalk somewhere. It could be somewhere I've done many times like my hometown or somewhere near by. But by restricting your focal length you have to see the same scenes differently. Now if you like to do landscapes this could work also.  A year or so ago Robert my photography wing man and I decided to do this challenge. It was a one lens or (Focal length) challenge. We decided to go to Wilmington NC and shoot the downtown area with one lens. The first thing that the challenge did was to lighten our load of camera gear that we were carrying. One lens and one camera body makes for a light load! When we got to our destination it started to sprinkle and light rain a little making the challenge even more difficult. Now we had to think about keeping our lens dry and looking at the scene with only one focal length. What a great time we had. I chose an old 50mm macro that I had. It was a slow to focus lens but pretty sharp. I think he had something like a 35mm ish lens that he was using. I do believe that the shots I got that day were some of my best of Wilmington that I have ever shot. Some of them have even made my website that is reserved for some of my best shots. Using that one focal length made me look in places I don't normally look for shots and at things that I would have never seen before but because I was restricted to the one focal length it made me look . Now I'm only proposing doing this for a day but some people do it for much longer.  Maybe a week, month or even a year. I don't think I could do a month or a year. That would be just too long. But a week I could do. Anyway if you are having problems getting your photography mojo going again try this exercise and you might find that you really like doing it and end up shooting more with just one focal length. Well that's enough for today until next time . Get out and Shoot!

Hey if you want to check out my photography go to my instagram account Max Stansell Photography there are over 2000 posts there. Here is the link

 Max Stansell Photography Instagram Link


Adventure Van "Finishing Touches" #398

March 13, 2026  •  Leave a Comment

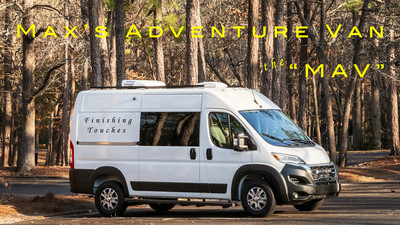
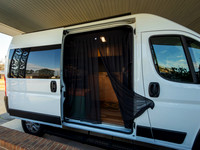
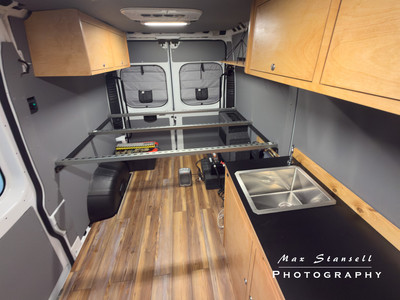
Hey Ya'll ! Hope you're having a great day! The weather has warmed up ( a bit) and I've been busy. I took the adventure van out for its first outing. Just a day trip but it went well. My wife and I were celebrating our 44th wedding anniversary and we went to the coast real quick. The van did well. It still has less than 2000 miles on it but I'm itching to put more on it. I first got interested in Vans probably before COVID and have been yearning for one ever since. But the prices on professionally built out vans are enormous! From 100-150 thousand and more depending on what type of van and buildout you get. So I used to call them made out of "Unobtanium" because I could never afford one. When me and my photography wing man Robert went to Utah it seems like I saw one on every corner. We went to Capital Reef National Park visitor center in Utah and I counted 27 of them in a small parking lot. About a year or so I came upon a company that did conversions on vans that you purchased (new or used) and they would do a basic conversion for 25 thousand dollars. Now this is just basic no electrical no AC or Fan just cabinets galley bed and walls and flooring . All done very nice and simple. So I got to thinking I could swing that if I found a good van at a good price. But trying to find a used van is tough especially one that isn't beat to death. They can also find a van for you. So I went and had them find a van. It was a 2026 and with the basic install, AC, Electrical and fan. The total price came to 100 thousand dollars. I almost got it but decided to keep looking for vans. If I found a good used one I could maybe do the whole van for 70 thousand. Well I found a van a new 2025 with only 300 miles on it. It had been up fitted to be an office of some sort with a desk but it had walls ceiling and flooring in it. It had a ladder rack on the top to hold work ladders that I had them remove. It was 38 thousand. So I got it and now I had a van with walls and ceiling and floor. Now could I do the rest? Well I'm pleased to say that I have ! Whoop Whoop !  I completed what I would have paid someone else to do and came in under 50 grand give or take. Thats Total! Van plus Conversion!

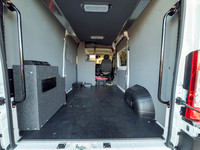
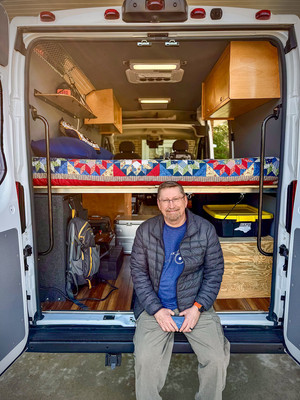
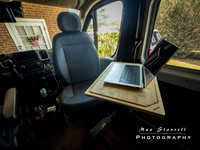
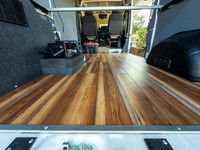
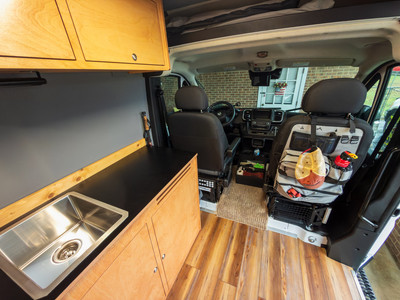
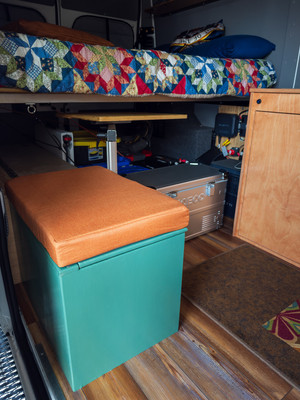
What I've done. I removed all of the office stuff that they had in the van. Including a bulkhead wall that was behind the drivers seat. I installed electrical system so I can charge my batteries when driving I have a 2000 amp inverter so I could have AC current and I have a charger that can charge via solar panel if I decide to get one. I have almost 6000 watt hours of Lithium Battery power which is enough to run my AC for up to 13 hours straight. Almost 500 amp hours. I installed a 12 volt exhaust fan and AC unit. I installed vinyl plank flooring over the subfloor. Here's a link to a time lapse of the floor install. Floor Install I installed a galley with fresh and dirty water storage with water pump for the faucet to work. I installed above head cabinets above the galley and the bed that I made and attached to the van wall structure.  I have a full sized platform bed with memory foam mattress.  I built a shelf to go above the head of the bed. Under the bed I have built a wheel well box that covers up the wheel well and serves for storage for dirty stuff like tents and chairs and the like. I have installed a swivel to the passenger seat so that when we are camping I can turn it around toward the camper portion and used as a chair. I have installed a Lagun table that will mount beside the passenger seat and I can work on my computer or eat there if it's not nice outside. I have purchased insulated window coverings that will help with the heat and cold when camping and keep folks from looking in. I have purchased bug netting that will cover the sliding door opening and rear door opening if we want to keep the doors open in a buggy environment.  I have installed "L-Track" on the floor under the bead to attach hooks so I can strap stuff down when traveling. I've made a bench with another Lagun table. It's basically just a box with a lid that can open up for storage (our Potty) and the top has a custom made cushion on it. Instead of staining it like all of the other furniture in the van I painted it green and the cushion is orange. (my favorite color) The Lagun table will serve as a workstation and eating and can serve as extra counter space when needed. When not needed it will swing under the bed and can be secured so it doesn't move around when traveling. I have more than I would have gotten from the van conversion company for a quarter of the price. Mostly my labor cost. Is it as nice as the conversion company that does it for a living? No but it is nice and most of all it's functional! Thats the important part. 

Other things I got for the van. I got an induction cook top. Wanted to give this a try and we should have plenty of power to support it. I will be taking a propane cooktop for backup. I installed a shore power plug so when we camp where there is power we can use it instead of the batteries. I purchased a Starlink dish so we could have high speed internet wherever we are. So even if we don't have cell signal we are still connected to the world. I purchased a security system with camera's I can monitor the van with when we are camping or out of the van. I can also keep track of "Forrest the Wonder Dog" to make sure he is okay if we have to leave him for a while and to make sure it's not too hot inside the van. I won't get into details for security reasons. So by the time this blog gets out I will have already camped in it and will be ready for a real trip!

Things I may add later on. There are a few things I may add later one. One is an awning. The one I like is just over a thousand dollars but I already have the roof rails to attach it too. I got a feeling my wife will have the final say on this and it will be added soon. The other big item is a solar panel. If I decide I need to add a solar panel I can easily do it and add it to the electrical system . I already have the roof rails and will just have to poke a hole in the roof to run the power wires from the panel to the solar charger already installed. We'll see if I need this or not. Other than that I can't think of any big items I'll have to add to the van. I know I will be adding small things and tweaking this and that. But I'll always be doing that. So with that said this will be the last blog about my van build. I'm really looking forward to getting this out on some trips and I have a few trips already in mind. Until next week "Get out and Shoot!"

Here is a video link to a virtual tour of the van. Max's Adventure Van Virtual Tour

Hey if you want to check out my photography go to my instagram account Max Stansell Photography there are over 2000 posts there. Here is the link

 Max Stansell Photography Instagram Link


Tiny Sensor Cameras #399

March 06, 2026  •  Leave a Comment

Hey Y'all ! Spring is just around the corner and things are starting to warm up! Hope you're having a great week. People often ask me how I come up with subjects for my blogs. Sometimes it's something that I'm working on or something I'm thinking about but sometimes it's stuff I hear on podcast. One of my favorite one to listen to is the Digital Story by Derrick Story.  That's where I got the idea for this blog is from his latest podcast Tips for small sensor photography. Please start listening to his podcast he has over 1000 of them with all kinds of topics.  Now for this blog. Tiny Sensor Cameras. We all have them. 

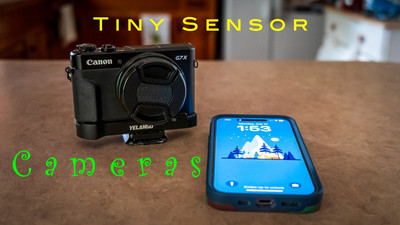
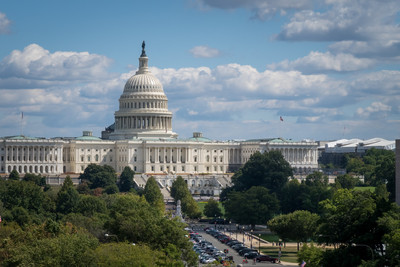
My tiny sensor cameras. What do I consider a tiny sensor camera? Well I guess anything that is smaller than a full frame sensor camera. Most of my time taking photo's has been with smaller than full frame sensor cameras. I have shot crop sensor cameras for quite a while and have just recently gone back to full frame again. Most of the photo's on this website that I have in my galleries are shot with crop sensor cameras. I like smaller sensor camera's because they are usually smaller and just fun to shoot. I have a small Canon Point and shoot that I love to shoot. I got it when my wife and I were going to Washington DC  for a week long trip and I didn't want to take a big camera with me while I was with her but I still wanted a dedicated camera. I got some fantastic photo's! I was very pleased. Of course I have my iPhone 16 pro that is with me all the time and it can take some great photo's also. So if you have a phone you have a tiny sensor camera .  Don't be afraid to use it. It's good for something more than just taking selfies. You can get great pantographs and macro and these cameras are great for street photography because no one really pays attention to someone using a phone to take a quick shot. Hey what about action cameras? Some of us use these little cameras to take video of our adventures but you can also use them for photo's also. Or you can grab a frame out of a video and make a photo out of it. Some of them really turn out good . I have used these for thumbnail photo's for YouTube videos that I have posted online. You can get unique angles and even under water shots from these cameras. 

Tips on using tiny sensor cameras. When using tiny sensor cameras you should use the same basic camera techniques as you do with your big sensor cameras. Holding the camera securely when taking a photo just as you would with a big camera. Slowly squeezing the shutter button not just jerking it down. Make sure the auto focus point is where you want it and it is in focus before pulling the trigger. I would suggest stopping down a stop or two from the lens maximum aperture for best focusing results. When doing a landscape shots I go old school and focus 1/3 into the scene and let the hyper focal distance do the work for you. Make sure that your shutter speed is at or above 1/60 seconds. Control your ISO keeping it as low as you can to help with noise in the shot. These are basic shooting principals that you should use with any camera you shoot. I also use external filters on my point and shoot camera. A polarizer or a 1/4 defuser filter works wonders for photography shots. I use a K&F 1/4 diffuser and polarizer in one that I got for 22 bucks off of Amazon. It works wonders and makes your shots look more film photograph like instead of being super digital looking. Smaller sensors are more prone to noise especially in lower light. Now these camera's have smaller megapixels than their big sensor brothers. Maybe only 12 or 20 but don't let that slow you down. If you get a shot that you want to print large you can use post processing to increase the size of the photo's resolution and make them great for print. Also if there is a little noise you can use de-noise in lots of programs to clear that noise up. 

Now are these little cameras as good as their big brothers. No they are not especially if you pixel peep at 200 percent. But how many photo's do you look at 200% when you're looking at photos online or in print? These little cameras are fun to shoot! I mean really fun. Lots of these little cameras have all kinds of cool and fun settings and film simulations on them that make them a blast to shoot. Another thing you can do is shoot in RAW + JPEG . When you do this you have the Raw image that you can do almost anything you want but when you also are shooting in JPEG which does processing for you also makes lens corrections to these little cameras that could make them more sharp. Sometimes I use the JPEG just as it came out of the camera and it looks great and other times I like to use the RAW so I can do more editing on it.  As you can tell I am a big fan of these little sensor cameras and use them a lot. You don't have to go out and buy a little sensor camera use your phone you can get some great shots out of them and can put all kinds of effects even long exposure. When I'm out doing water falls I like to take one with my phone and I can use the long exposure effect and can get dramatic dreamy water. We have a lady in our camera club that takes great photo's with her phone and I am always impressed on what she can come up with. Well that's enough of me for this week . It's warming up outside so Get Out and Shoot! A small sensor camera! 

Hey if you want to check out my photography go to my instagram account Max Stansell Photography there are over 2000 posts there. Here is the link

 Max Stansell Photography Instagram Link


Adventure Van Update " Cabinets and Galley" #397

February 27, 2026  •  Leave a Comment

Hey Everyone! Hope you are having a great week! Me? Pretty Good. Today's blog is an update on my van conversion. If you don't know I've purchased a Ram Promaster Cargo Van and am converting it into a Camper Van or as I call it an Max's Adventure Van or "MAV" for short.. The last update was on the floor install of the van I've already done the roof work with AC and exhaust fan install. (the scary part of the install) I have made quite a bit of progress since then and thought I would give you a update. I'm writing this blog from the van itself! I'm watching the Olympics on my iPad and am writing my blog as I will when I'm on the road with my new MacBook Pro . The weather has been very cold since we last talked about the van and finding temps that I can work in have been far and few between. The cold weather has really bothered me more this year than I can remember. Maybe it's been colder but I think it's because I'm older. At any rate it's been cold and days that I can work in have been scarce. This week it has warmed up quite a bit and I have made some significant progress. So let's talk about it.

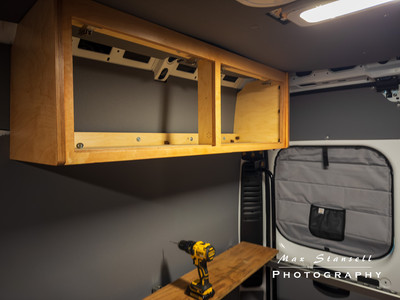
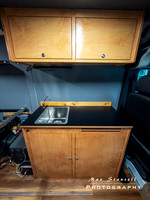
Furniture Assembly and Prep. I purchased two above head cabinets from a van conversion company. They supply all the parts and they are computer cut so you can assemble. They are rough cut so they need lots of sanding. They are made of Baltic Birch plywood and are cut to fit the Ram Promaster that I have. Different vans manufactures have different shapes on the insides. The boxes that the furniture came in were heavy I had to have someone help me take them to the garage where I was going to do the work. They had been in the house waiting for a good day to work on them. The first order of business was to sand the different parts. Lots of parts! I did the cabinets first. Sanding took a full day. After sanding I dry fitted to make sure everything went together. Then there was the staining. I decided to put the cabinets together before staining and that might have been a mistake but that's what I did. After both cabinets were together I started the staining. The wood was pretty white and wanted to darken up bit. I went with Colonial Maple for the color . I let my wife pick out the color as my eyes don't see shades of colors well. So staining is not only the outside but the inside also. Then it was time for the galley I did the same process as the cabinets. The cabinets took one day and so did the Galley. Now it was time for polyurethane. I wanted to put at least 3 coats on the Cabinets and Galley. On the inside I opted for only one coat but the outsides and the cabinet doors got three on both sides. But the weather had turned cold again and my garage doesn't have heat so I decided to bring everything inside to put the poly on. I was using water based polyurethane so there was no smell. It took two days to do cabinets and galley. They were ready to install now I just had to wait on the weather to install them.

Installation of Furniture. Well it took a couple of weeks an Ice storm and a Snow storm and we don't really get those types of storms here in the south. So I was trying to wait patiently with not much success . I was always checking the weather and then a week away I saw a couple of days that would be warm enough for me to work in. When the days came I took the cabinets to the Van and my wife helped me with the galley to get it into the van. I was going to have someone help me with the cabinets but that didn't work out. So the first one I installed by myself. It was all I could do was to hold the cabinet in place and screw the cabinet into the van. Now there are supports like ribs that go around the van for support and I attached the cabinet with metal screws to secure the bottom part of the cabinet and on the top early on in the process I installed some supports that I could screw the cabinets into. I did have to have my wife help me on the other cabinet because I was wore out holding with one hand and using a drill with the other .  Installing the galley was a little easier  ( no lifting) but the way it sat against the wall there was a gap. So I installed a back splash board that covered up that gap. It's a 3/4 inch board that I sanded and stained and polyurethaned to match the cabinets. I Secured to a support on the back half and screwed the galley to the floor. With the galley there was also the install of the sink and water pump and water storage tanks and faucet all which were supplied with the kit. Also the original galley was made for a upright college sized fridge but I didn't want that so they gave me a cabinet door and shelves to go on the inside for storage which every van lifer knows is very important.

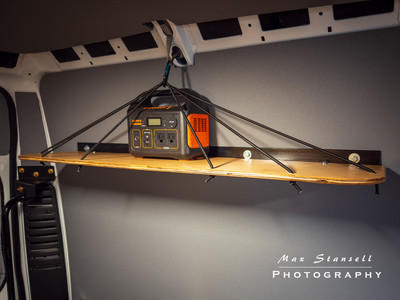
Shelf fabrication and install. At the foot of the bed will be cabinets for clothes but at the head of the bed there will be a shelf where we can charge our phones at night and during the day we can store bedding. I saw a shelf design that I liked and decided to use it. When installing the bed rail supports early on in the process I also made a support for the shelf and it's been looking at me for a while. Now I'm not great at wood working or making things pretty. That's why I bought cabinets that had been thought out and designed by someone else but a shelf is just a piece of wood right? So I went to Lowes and got some 1/2 inch birch and made a board 43 X 10 inches. I rounded off the front corners of the shelf by using a gallon paint can as my template so at least they would match. I didn't want any sharp corners so I used a 1/4 inch router bit to round off the edge. I then stained and polyurethaned it like the cabinets and galley. I marked and drilled the mounting holes and installed to the support bracket I installed earlier in the build. I also drilled six holes prior to installing it that I will run bungee cord through. Bungee cord goes from the shelf through a carabiner that is secured to the roof of the van and then the bungee goes back to the other side of the shelf. I did this two more times to create a bungee cord system that can be used to hold bedding during the day. By bedding I mean sleeping bag or blanket. It actually turned out pretty good and even my wife liked it.

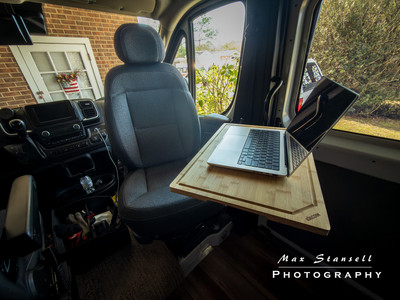
Lagun table install. You might not know what a Lagun table is but it's a table that can hook to the side of the van and can be adjusted up, down and side to side. It was made popular in marine installs and the van folks picked it up and ran with it. I have it so I can mount it to the side of the passenger seat and have a table when the chair is swiveled around facing the back of the van. It's the table I'm using now to put my computer on or to eat on. There will be one more Lagun table later on in the build for another seat. I had to get a special bracket to attach to the passenger seat pedestal. I found on on Etsy and it worked out great. I ordered the Lagun mount and bracket arms from Lagun but I still had to come up with a table top. Anything associated with van conversions is very expensive. Some would say that they put a "van tax" on anything van related. But I saw that some folks were using extra large cutting boards for table tops at a fraction of the price. I got a 20 X 14 bamboo cutting board for 30 bucks the same size built for a Lagun table top would have been 150 bucks. I will do the same thing with the other table top but a little bigger.

So now the inside of the van is starting to look like a camper van. I have installed a light under the cabinet over the galley and have installed a security system which I won't get into for obvious reasons. I still have lots to do but Its getting closer. I have also ordered bug nets that will go over the back doors and the sliding door so in spring we can have the door open without the bugs eating us up. They have magnetic openings so when you go through they automatically shut. I haven't put them up yet but will as soon as the weather warms up. They are installed with magnets so they are not permanent. This up coming week I will install the bed platform and the mattress and some of the trim around the top of the inside of the van. After that there will be the fabrication of a boot box that will be a seat with a cushion on top and a wheel well box on the passenger side with a top that lifts up for storage of camping stuff and that will be it for the big stuff. Then there will be just little things here and there. Like maybe an awning will be in the future. But we will be taking it out on test trips way before then. Well that's pretty much it for the update. Until next time Get out and Shoot!

Hey if you want to check out my photography go to my instagram account Max Stansell Photography there are over 2000 posts there. Here is the link

 Max Stansell Photography Instagram Link


Subscribe
RSS
Archive
January February March April May June July August (4) September (4) October (5) November (4) December (3)
January (5) February (4) March April (2) May (1) June July August September October November (3) December (2)
January February March April May June July August (1) September (1) October (1) November (1) December (1)
January (1) February March April May June July August September October (3) November (2) December