Adventure Van Update " Cabinets and Galley" #397
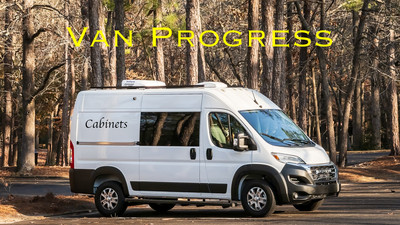
 Hey Everyone! Hope you are having a great week! Me? Pretty Good. Today's blog is an update on my van conversion. If you don't know I've purchased a Ram Promaster Cargo Van and am converting it into a Camper Van or as I call it an Max's Adventure Van or "MAV" for short.. The last update was on the floor install of the van I've already done the roof work with AC and exhaust fan install. (the scary part of the install) I have made quite a bit of progress since then and thought I would give you a update. I'm writing this blog from the van itself! I'm watching the Olympics on my iPad and am writing my blog as I will when I'm on the road with my new MacBook Pro . The weather has been very cold since we last talked about the van and finding temps that I can work in have been far and few between. The cold weather has really bothered me more this year than I can remember. Maybe it's been colder but I think it's because I'm older. At any rate it's been cold and days that I can work in have been scarce. This week it has warmed up quite a bit and I have made some significant progress. So let's talk about it.
Furniture Assembly and Prep. I purchased two above head cabinets from a van conversion company. They supply all the parts and they are
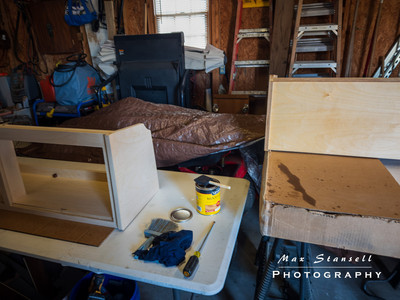 computer cut so you can assemble. They are rough cut so they need lots of sanding. They are made of Baltic Birch plywood and are cut to fit the Ram Promaster that I have. Different vans manufactures have different shapes on the insides. The boxes that the furniture came in were heavy I had to have someone help me take them to the garage where I was going to do the work. They had been in the house waiting for a good day to work on them. The first order of business was to sand the different parts. Lots of parts! I did the cabinets first. Sanding took a full day. After sanding I dry fitted to make sure everything went together. Then there was the staining. I decided to put the cabinets together before staining and that might have been a mistake but that's what I did. After both cabinets were together I started the staining. The wood was pretty white and wanted to darken up bit. I went with Colonial Maple for the color . I let my wife pick out the color as my eyes don't see shades of colors well. So staining is not only the outside but the inside also. Then it was time for the galley I did the same process as the cabinets. The cabinets took one day and so did the Galley. Now it was time for polyurethane. I wanted to put at least 3 coats on the Cabinets and Galley. On the inside I opted for only one coat but the outsides and the cabinet doors got three on both sides. But the weather had turned cold again and my garage doesn't have heat so I decided to bring everything inside to put the poly on. I was using water based polyurethane so there was no smell. It took two days to do cabinets and galley. They were ready to install now I just had to wait on the weather to install them.
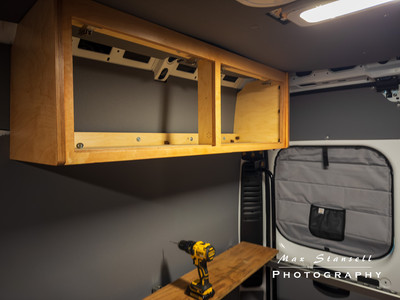 Installation of Furniture. Well it took a couple of weeks an Ice storm and a Snow storm and we don't really get those types of storms here in the south. So I was trying to wait patiently with not much success . I was always checking the weather and then a week away I saw a couple of days that would be warm enough for me to work in. When the days came I took the cabinets to the Van and my wife helped me with the galley to get it into the van. I was going to have someone help me with the cabinets but that didn't work out. So the first one I installed by myself. It was all I could do was to hold the cabinet in place and screw the cabinet into the van. Now there are supports like ribs that go around the van for support and I attached the cabinet with metal screws to secure the bottom part of the cabinet and on the top early on in the process I installed some
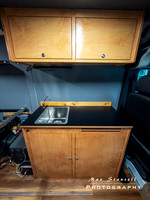 supports that I could screw the cabinets into. I did have to have my wife help me on the other cabinet because I was wore out holding with one hand and using a drill with the other . Installing the galley was a little easier ( no lifting) but the way it sat against the wall there was a gap. So I installed a back splash board that covered up that gap. It's a 3/4 inch board that I sanded and stained and polyurethaned to match the cabinets. I Secured to a support on the back half and screwed the galley to the floor. With the galley there was also the install of the sink and water pump and water storage tanks and faucet all which were supplied with the kit. Also the original galley was made for a upright college sized fridge but I didn't want that so they gave me a cabinet door and shelves to go on the inside for storage which every van lifer knows is very important.
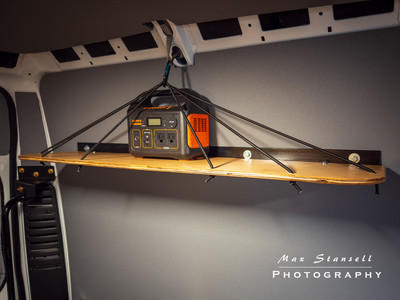 Shelf fabrication and install. At the foot of the bed will be cabinets for clothes but at the head of the bed there will be a shelf where we can charge our phones at night and during the day we can store bedding. I saw a shelf design that I liked and decided to use it. When installing the bed rail supports early on in the process I also made a support for the shelf and it's been looking at me for a while. Now I'm not great at wood working or making things pretty. That's why I bought cabinets that had been thought out and designed by someone else but a shelf is just a piece of wood right? So I went to Lowes and got some 1/2 inch birch and made a board 43 X 10 inches. I rounded off the front corners of the shelf by using a gallon paint can as my template so at least they would match. I didn't want any sharp corners so I used a 1/4 inch router bit to round off the edge. I then stained and polyurethaned it like the cabinets and galley. I marked and drilled the mounting holes and installed to the support bracket I installed earlier in the build. I also drilled six holes prior to installing it that I will run bungee cord through. Bungee cord goes from the shelf through a carabiner that is secured to the roof of the van and then the bungee goes back to the other side of the shelf. I did this two more times to create a bungee cord system that can be used to hold bedding during the day. By bedding I mean sleeping bag or blanket. It actually turned out pretty good and even my wife liked it.
Lagun table install. You might not know what a Lagun table is but it's a table that can hook to the side of the van and can be adjusted up, down
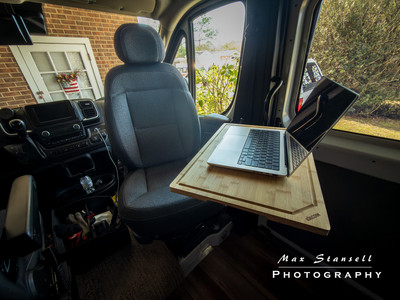 and side to side. It was made popular in marine installs and the van folks picked it up and ran with it. I have it so I can mount it to the side of the passenger seat and have a table when the chair is swiveled around facing the back of the van. It's the table I'm using now to put my computer on or to eat on. There will be one more Lagun table later on in the build for another seat. I had to get a special bracket to attach to the passenger seat pedestal. I found on on Etsy and it worked out great. I ordered the Lagun mount and bracket arms from Lagun but I still had to come up with a table top. Anything associated with van conversions is very expensive. Some would say that they put a "van tax" on anything van related. But I saw that some folks were using extra large cutting boards for table tops at a fraction of the price. I got a 20 X 14 bamboo cutting board for 30 bucks the same size built for a Lagun table top would have been 150 bucks. I will do the same thing with the other table top but a little bigger.
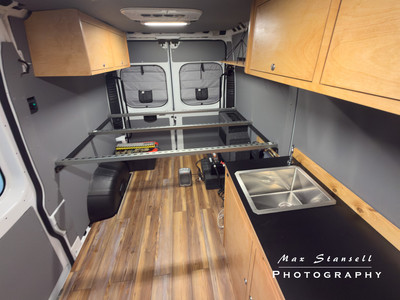 So now the inside of the van is starting to look like a camper van. I have installed a light under the cabinet over the galley and have installed a security system which I won't get into for obvious reasons. I still have lots to do but Its getting closer. I have also ordered bug nets that will go over the back doors and the sliding door so in spring we can have the door open without the bugs eating us up. They have magnetic openings so when you go through they automatically shut. I haven't put them up yet but will as soon as the weather warms up. They are installed with magnets so they are not permanent. This up coming week I will install the bed platform and the mattress and some of the trim around the top of the inside of the van. After that there will be the fabrication of a boot box that will be a seat with a cushion on top and a wheel well box on the passenger side with a top that lifts up for storage of camping stuff and that will be it for the big stuff. Then there will be just little things here and there. Like maybe an awning will be in the future. But we will be taking it out on test trips way before then. Well that's pretty much it for the update. Until next time Get out and Shoot!
Hey if you want to check out my photography go to my instagram account Max Stansell Photography there are over 2000 posts there. Here is the link
Max Stansell Photography Instagram Link
