Cold weather Photography #393

January 30, 2026  •  Leave a Comment

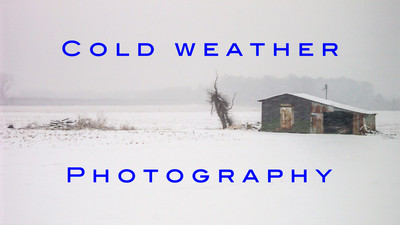
Hey Everyone! Hope everyone is doing well. Me? Cold! Waiting for a winter Ice Storm to roll though and thought I would write a blog about cold weather photography. Now if you're like me you don't like the cold weather. I think the older I get the colder I get. So the first thing I want to cover is how to keep warm when you are out shooting in the cold.

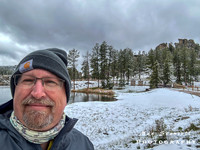
Protecting you! Protecting yourself and keeping comfortable will make for much better photographs . The more uncomfortable you are the less you concentrate on taking photographs and more on how to get warm or how to get out of the weather that you are in. First of all you want to dress in layers. Here is a link of a blog I wrote years ago on the subject. Winter Photography, Dressing The Part.  Dressing in layers makes it much easier to keep a comfortable temperature being able to add or subtract layers as conditions change. Proper head wear is also a great way to stay warm with hats and hoods to keep warm. One thing that I found that really keeps me warm is a scarf or neck gator that keeps the wind off of your neck. When working with a cold camera gloves are a must. There are photography specific gloves where your fingers can poke out to make adjustments and touch screen actions then you can move them back into the glove to keep warm. Another way to keep hands and figures warm is with hand warmers. You can get these at Walmart or any Sporting goods store. They are usually little pouches that you shake up and the chemicals inside get warm. These are great to have in your pockets. I have some electric ones that you charge up and you can control how warm they get. Insulated shoes or boots also help. If you're like me when my feet get cold I'm done. So I have some insulated boots that keep my feet toasty and warm. They also make shoe or feet warmers much like the hand warmers that you put into your shoes to keep your feet toasty.

Camera Equipment, When shooting in the cold protecting your camera and lenses are key. First let's talk about batteries. Batteries don't last as long in the cold and changing frequently is expected so keep spares handy and warm. A good tip is to keep batteries in a warm inner pocket of coat or inner layer to keep spare batteries warm. Sometimes you can take an exhausted battery and warm it up and it will work again. Changing temperatures  can be harmful for cameras. Moisture can accumulate when going from extremes especially going from cold outside to a warm inside. When coming into a warm area like after your shoot it is advisable to keep your camera in the bag for a hour or so before you get it out and start changing batteries and cards. Moisture from the warm house will be attracted to the cold metal parts of your camera much like a glass of ice tea on a hot summers day and condensation will accumulate on the glass. Letting the camera acclimate to the colder weather will also help to keep your lenses from fogging up .  Taking a warm camera into a cold environment will make lenses fog up. Now depending on how cold it is outside may affect the way your camera will operate. Sometimes it will affect the back display and it won't work. It's a good idea to look up your camera and see what the cold limits are. Different brands have different limits. The limits to my Sony is 14 degrees F to 104 degrees F. But I have seen reports where the camera worked beyond these limits. But check your camera.

Well that's enough jabbering for today. Until Next week Get out and Shoot!

Hey if you want to check out my photography go to my instagram account Max Stansell Photography there are over 2000 posts there. Here is the link

 Max Stansell Photography Instagram Link


Typical Photography Workshop with GAPC

January 23, 2026  •  2 Comments

Hi Everyone! This is a little short in-between blog that I'm writing just for the GAPC (Goldsboro Area Photography Club) . Now I have been a member for over a decade and absolutely have benefitted from being a member of the club. When I joined the club I thought I was a decent photographer but the club showed me how narrow my photography knowledge was. The club has opened my eyes to all sorts of photography. Mainly through the use of workshops. We hold a workshop every month. Thats 12 different workshops a year plus all of the other outings that we also do. The workshops can be anything from Astro/Night Photography to "One Light" Portraits and everything in-between . Our club has meetings every month on a Monday and usually the workshop follows on the next Saturday.  During our club meetings we will have some sort of presentation say "Wildlife Photography" was this months. The following Saturday we will have a workshop and go and do some Wildlife photography at some wildlife refuge or place where we know we will have a good chance to see wildlife. We have seen Swans, Geese, Bears, and all kinds of creatures over the years while on our wildlife workshops.  And the same is for other types of photography. If we are doing portraits we have a studio or some place where we can shoot and get a model or two and practice shooting portraits. Using the lights and all the things that go with portraits. The same with Astro, Street and so on. These workshops are planned at the beginning of the year with the officers of the club coming up with topics and activities for the year. A calendar is made and we try to have the presentation and the workshop work together . Say using strobes for portraits meeting presentation with a Portrait photo shoot for the workshop. Our club does a pretty good job at coordinating the two. Ideas for topics come from yearly critiques filled out by our members at the end of the year with suggestions for future workshops. Also with suggestions on places we might want to go and visit as a club like the Zoo or state or national park we might visit. After the calendar is set we (the officers) get people that are highly skilled in the area of focus to present a 30 min presentation at the meeting . Usually with a slide show of some sorts with examples on the topic. We then look for someone to lead the workshop. This is also someone that is skilled in the workshop topic. This person does the planning part for the workshop. Where and when we meet , maybe a quick demonstration (like studio lights) and generally helps out with the people that are new to the topic or just new to photography. Our club has many levels of expertise in photography from Professional to beginner. Someone is always there to help when you have a question or are just not sure where to start. With the number of members we have there is always someone who can help. The workshop leader usually has a place set aside for Lunch for that day. If we are traveling somewhere we carpool and people who are riding chip in for gas to the driver of the vehicle. I have personally grown very much as a photographer from being a member and going on the workshops of the Goldsboro Area Photography Club. But you must be a member to go on these great workshops. Like all things in life you must show up! The more workshops you go to even if you don't know anything about the topic. Learning different types of photography makes you a better photographer in the area that you are interested in. So when we have our next meeting come and check us out. We would love to have you join our club and the workshops. 


Adventure Van Progress, Floor #391

January 16, 2026  •  Leave a Comment

Hey Everyone! Hope your week is going great! Me? Pretty good! Hope the New Year is treating you well. This week’s blog is an update to my Adventure Van conversion Progress. The last time we talked I had just finished the roof work of the van. Well all except the Solar panel which I still haven't installed. It will be one of the last things I install if I really need one at all. We'll see. The next step in the van conversion is installing the flooring. I decided to install the whole flooring first instead of putting furniture down and flooring around it just because it would be easier to do the whole floor and just put the furniture on top of the floor and it would look better also. 

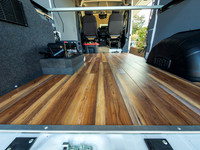
Flooring. What type of flooring will I use. Well there is all types from laminate, to linoleum . It can be put in planks or in one big sheet. For me durability and being water proof are the keys. I don't want anything that will scratch easily. For a subfloor I'm going to use the floor that came with the van. It is strong and durable and I don't really see the need to replace it with plywood. The flooring I decided on was LVP (luxury vinyl plank) . It is strong and durable and I chose a pine finish. Although I hate pine trees (inside joke) I thought it looked the best.  It has a underlayment already built into the plank so there is no need to put one under the flooring. Flooring is fairly inexpensive to install and I got the materials from my local Lowes store. When it was all finished I spent a little over 200 dollars and it looks pretty good. All you have to do is figure out the square footage and you can calculate how many boxes you will need to buy. I miss calculated and got 6 boxes but only needed 4 so I returned the unused boxes. 

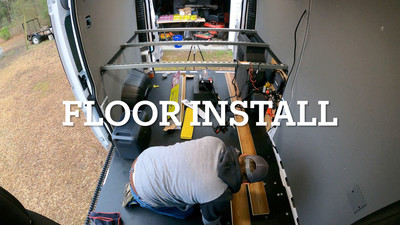
Installation. Installing the planks is pretty easy. They interlock together with a tongue and groove type of connection then you use a rubber mallet to lock them in place. I have installed laminate flooring before (many years ago) so I knew how it worked. I watched some Youtube videos and how to install in a van . The biggest thing is to get the first row as parallel to the sides as you can. The rest is pretty easy except when you have to cut around things. Cutting the length is easy. You flip the board over and score with a razor a few times and you can crack it over your knee and it breaks off very nicely. But to get around curves you have to use a jigsaw but it cuts really easily. I did make some mistakes like measuring from the wrong end and cutting but you have to allow for some learning curve when you're doing something you haven't done in a while. After the main floor was set I reused some metal end protectors that were on the original floor to protect and hide the ends of the wood at the doors. It turned out very nice. Then at the edge between the cab and the floor I got a piece of
aluminum angle and placed it to cover up the edges of the wood . It turned out nice. Some of the corners around the wheel wells I left a little gap but those will be covered up with a wheel well box on the passenger side and the electrical stuff on the drivers side.  Here is a link to a time lapse video of the install. Floor Install

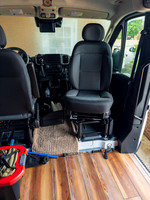
One other thing I installed was a swivel for the passenger seat. That way when you're camping you can turn the seat around and have another chair in the camper area of the van. It was fairly easy to install. I had to disconnect the battery. (because of airbags) Remove the seat. Put the swivel on the seat pedestal and install the seat on top of the swivel. Then hook up the battery. It was fairly easy and took a hour or so to do and it works great. It does raise the seat about an inch but if you don't know about it you won't notice it. Pretty happy with the install.

The next step in the van conversion is the assembly of the cabinets and the galley and the finishing of them. I bought unfinished ones that I can put together and finish. So until then Get out and Shoot!

Hey if you want to check out some more of my photography go to my instagram account Max Stansell Photography there are over 2000 post there. Here is the link

 Max Stansell Photography Instagram Link


New Year's day Shoot #390

January 09, 2026  •  Leave a Comment

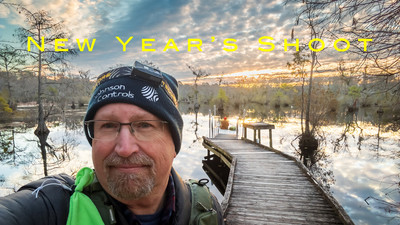
Hey Everyone! Hope you've had a great New Year so far. This week I want to talk about a tradition that I and my photography wingman Robert have been doing the last 6 years or so.  It's to capture the first light of the new year. Each year we try to capture something different from the highest point on the east coat (Mount Mitchell) to the coat at Carolina Beach. We attempted a shoot from the rooftop of a hotel in Charlotte NC but the weather really got us there. But each year we go out and shoot something different. This year was no different. We were planning to go to Florida to shoot Saint Augustine but that plan kind of fell through so this year we decided to stay fairly local and shoot first light through a swamp.  Living in eastern North Carolina finding a swamp is very easy as they are very abundant. But which one. We decided to go to a state park that we had visited before a few years ago. Merchants Millpond State Park in the north eastern part of the North Carolina.

Merchants Millpond State Park- From where we live to the park is about a 2 1/2 hour drive so we had to leave early. So we planned a departure for 4 AM. Kind of early even for me. Now I really haven't shot anything lately but a Christmas parade I had to get my gear ready for the shoot. You know format SD cards, Charge batteries, Clean gear. It also has been kind of cold the last couple of weeks and (Max doesn't like to get cold) so I packed up some cold weather gear to include insulated coveralls, gloves , neck gator, and some electric hand warmers and stocking cap. So we met at Roberts house and headed out into the darkness.  GPS set and on our way. When driving in the dark everything seems to look the same so nothing really to see but we did have lively conversation like always. When driving in this situation we are always on the lookout for deer. I have hit a couple in my travels in years past and we even had a camera club member hit one on the way back from a night shoot on the coast. We saw a few and even had to take some evasive action to miss one of them but we made it to our destination with no problems. When we got there we noticed that the gates were locked keeping us out of the parking lots that we wanted park. They didn't open up until 8am which would be too late for us. So we found a parking spot outside of the park and hiked in. Hiking in the dark with headlamps on wasn't too bad and neither of us old guys fell down. We found our spot and waited for the sun to show itself. 

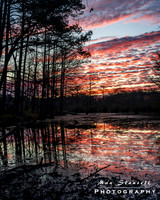
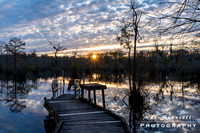
The Shoot. To me shooting sunrises is all about the before the sun breaks the horizon and right at the breach so you can get stardust. Of course using a tripod because of the low light in the beginning. But after a while you will have enough light to get the camera off of the tripod.  I brought 3 lenses with me but mostly used the 20-70mm but also used 70-300 and a 16-35mm. We had some cloud cover that when the sun is below the horizon really gives color to the clouds and we had some great reds and oranges in the beginning. After a while we decided to change our position to another location to capture the sun breaking the horizon. Of course there were trees in the horizon so not as prolific as say at the beach shot but still very good. We shot for about an hour or so and then headed out to get some breakfast and on the way home.  All in all it was a great shoot and lots of fun. 

This is a great tradition that Robert and I have started and maybe you should try to start also. It's a great way to start your photography year. Until next week Get out and Shoot!

Hey if you want to check out some more of my photography go to my instagram account Max Stansell Photography there are over 2000 post there. Here is the link

 Max Stansell Photography Instagram Link

Video by Robert O'Sullivan


Adventure Van Progress Roof Work #389

January 02, 2026  •  Leave a Comment

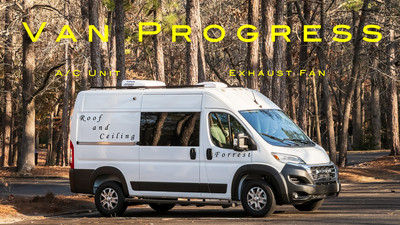
Hey Everyone! Hope you're having a great week! We are in the middle of the holidays as I am writing this blog so lots of activities and holiday stuff is going on.  I  have been working on the van and the Roof work and for now is almost complete. (Solar Panel may be going up later) This part of the build is the scariest for me . The build is going to be done in stages. Stage one Electrical, Stage two bed frame, Stage 3 Roof work, Stage 4 floor, Stage 5 Cabinets , Stage 6 Galley and the last and final stage will be the most fun taking it out and testing. Modifications will go on for ever as I find new products or gadgets that will make things easier. Right now I'm in Stage 3. Roof work. 

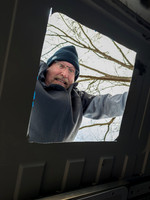
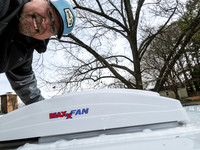
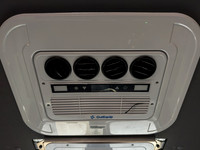
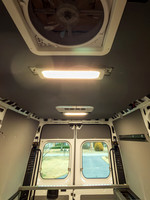
Roof Work entails installing Exhaust Fan and installing Air Conditioning for the back half of the van. When I say back half I mean where the bed, galley and the living area. (camper part) Most everything in the camper part of the van will be 12 volt and run off of battery power separate from the van's main battery for the engine. The scary part about installing the exhaust fan and AC is that I have to cut a hole in the top of my new van. Yikes!!! And I have to get up on top of the van to do it. I needed some help for this portion of the install so my son was my helper. Step one was the Exhaust Fan install. I started with the easiest first. Now I have studied and watched many YouTube videos on how to install the fan so I was pretty confident on the "how to" part of it now was just the "doing" part left. I have been waiting for good weather. Well I must say that the install of the fan went without a hitch and turned out pretty well. After you poke a hole in the roof there is no going back. LOL We were finished in a few hours and the next day I finished all of the insulation reinstall on the inside of the van around the fan and run the power wires to the fuse panel it turned out great. Next was the AC unit. It is much heaver than the exhaust fan and help was definitely needed in getting this unit on the roof. But as before being well prepared and having everything ready was the key. I had to do some prep work on the AC before it went in . It comes with a external electrical cord that I would have to put another hole in the van which I didn't want to do so I rerouted the power through the return duct in the same hole as the AC unit and it worked out great. Then the big question will it fit under my carport! The total hight of the Van empty is 9 foot 2 inches to the top of the AC unit. The clearance of my carport is 9 foot and 3ish inches. It just made the clearance. But this is the tallest the van will be with gear and all loaded down the van will squat a little giving me even more clearance. But it's close when empty. LOL The next day I did all of the inside work. Routing and securing the power cord , Re-insulating the roof around the AC. Then there was re installing the ceiling . To do this I had to cut holes that match where the holes were for the new AC and exhaust fan. To do this I made a cardboard template with the hole in it and transferred that to the ceiling. The ceiling is about 3/8 inch corrugated plastic which is very tough and heavy and awkward to handle. So I made a couple of braces to hold it up as I secured it to the roof of the van. After some struggling I got the ceiling in place and secured it. Then there was just the trim pieces on the AC and the Exhaust Fan to go back in. 

It actually turned out better than I thought and I am very pleased and glad that I am through with this phase of the build which I consider the most difficult and scary. If everything goes as well as this part did I should have no problems meeting my Spring deadline of having this van complete and ready for adventure. The next phase will be the floor installation. Until then wish me luck! And Get out and Shoot!

Hey if you want to check out my photography go to my instagram account Max Stansell Photography there are over 2000 posts there. Here is the link

 Max Stansell Photography Instagram Link


Subscribe
RSS
Archive
January February March April May June July August (4) September (4) October (5) November (4) December (3)
January (5) February (4) March April (2) May (1) June July August September October November (3) December (2)
January February March April May June July August (1) September (1) October (1) November (1) December (1)
January (1) February March April May June July August September October (3) November (2) December