Adventure Van Progress, Floor #391
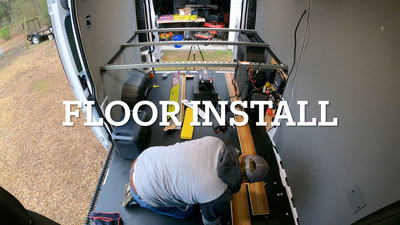
 Hey Everyone! Hope your week is going great! Me? Pretty good! Hope the New Year is treating you well. This week’s blog is an update to my Adventure Van conversion Progress. The last time we talked I had just finished the roof work of the van. Well all except the Solar panel which I still haven't installed. It will be one of the last things I install if I really need one at all. We'll see. The next step in the van conversion is installing the flooring. I decided to install the whole flooring first instead of putting furniture down and flooring around it just because it would be easier to do the whole floor and just put the furniture on top of the floor and it would look better also.
Flooring. What type of flooring will I use. Well there is all types from laminate, to linoleum . It can be put in
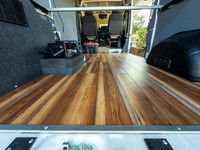 planks or in one big sheet. For me durability and being water proof are the keys. I don't want anything that will scratch easily. For a subfloor I'm going to use the floor that came with the van. It is strong and durable and I don't really see the need to replace it with plywood. The flooring I decided on was LVP (luxury vinyl plank) . It is strong and durable and I chose a pine finish. Although I hate pine trees (inside joke) I thought it looked the best. It has a underlayment already built into the plank so there is no need to put one under the flooring. Flooring is fairly inexpensive to install and I got the materials from my local Lowes store. When it was all finished I spent a little over 200 dollars and it looks pretty good. All you have to do is figure out the square footage and you can calculate how many boxes you will need to buy. I miss calculated and got 6 boxes but only needed 4 so I returned the unused boxes.
Installation. Installing the planks is pretty easy. They interlock together with a tongue and groove type of connection then you use a rubber mallet to lock them in place. I have installed laminate flooring before (many years ago) so I knew how it worked. I watched some Youtube videos and how to install in a van . The biggest thing is to get the first row as parallel to the sides as you can. The rest is pretty easy except when you have to cut around things. Cutting the length is easy. You flip the board over and score with a razor a few times and you can crack it over your knee and it breaks off very nicely. But to get around curves you have to use a jigsaw but it cuts really easily. I did make some mistakes like measuring from the wrong end and cutting but you have to allow for some learning curve when you're doing something you haven't done in a while. After the main floor was set I reused some metal end protectors that were on the original floor to protect and hide the ends of the wood at the doors. It turned out very nice. Then at the edge between the cab and the floor I got a piece of
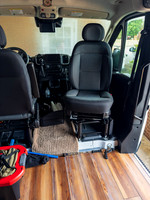
aluminum angle and placed it to cover up the edges of the wood . It turned out nice. Some of the corners around the wheel wells I left a little gap but those will be covered up with a wheel well box on the passenger side and the electrical stuff on the drivers side. Here is a link to a time lapse video of the install. Floor Install
One other thing I installed was a swivel for the passenger seat. That way when you're camping you can turn the seat around and have another chair in the camper area of the van. It was fairly easy to install. I had to disconnect the battery. (because of airbags) Remove the seat. Put the swivel on the seat pedestal and install the seat on top of the swivel. Then hook up the battery. It was fairly easy and took a hour or so to do and it works great. It does raise the seat about an inch but if you don't know about it you won't notice it. Pretty happy with the install.
The next step in the van conversion is the assembly of the cabinets and the galley and the finishing of them. I bought unfinished ones that I can put together and finish. So until then Get out and Shoot!
Hey if you want to check out some more of my photography go to my instagram account Max Stansell Photography there are over 2000 post there. Here is the link
Max Stansell Photography Instagram Link
