Adventure Van Progress, Floor #391

January 16, 2026  •  Leave a Comment

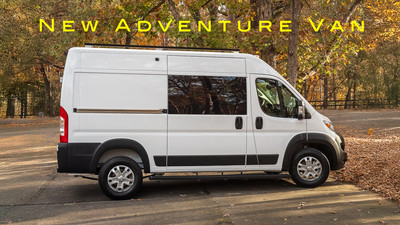
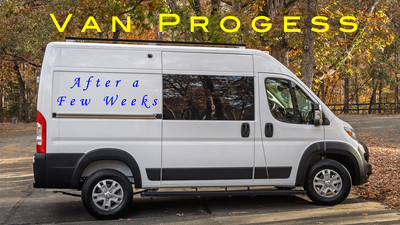
Hey Everyone! Hope your week is going great! Me? Pretty good! Hope the New Year is treating you well. This week’s blog is an update to my Adventure Van conversion Progress. The last time we talked I had just finished the roof work of the van. Well all except the Solar panel which I still haven't installed. It will be one of the last things I install if I really need one at all. We'll see. The next step in the van conversion is installing the flooring. I decided to install the whole flooring first instead of putting furniture down and flooring around it just because it would be easier to do the whole floor and just put the furniture on top of the floor and it would look better also. 

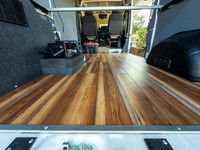
Flooring. What type of flooring will I use. Well there is all types from laminate, to linoleum . It can be put in planks or in one big sheet. For me durability and being water proof are the keys. I don't want anything that will scratch easily. For a subfloor I'm going to use the floor that came with the van. It is strong and durable and I don't really see the need to replace it with plywood. The flooring I decided on was LVP (luxury vinyl plank) . It is strong and durable and I chose a pine finish. Although I hate pine trees (inside joke) I thought it looked the best.  It has a underlayment already built into the plank so there is no need to put one under the flooring. Flooring is fairly inexpensive to install and I got the materials from my local Lowes store. When it was all finished I spent a little over 200 dollars and it looks pretty good. All you have to do is figure out the square footage and you can calculate how many boxes you will need to buy. I miss calculated and got 6 boxes but only needed 4 so I returned the unused boxes. 

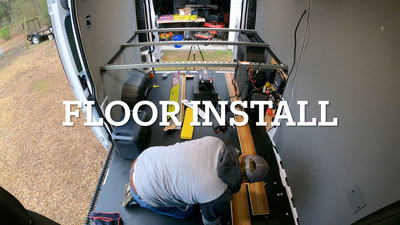
Installation. Installing the planks is pretty easy. They interlock together with a tongue and groove type of connection then you use a rubber mallet to lock them in place. I have installed laminate flooring before (many years ago) so I knew how it worked. I watched some Youtube videos and how to install in a van . The biggest thing is to get the first row as parallel to the sides as you can. The rest is pretty easy except when you have to cut around things. Cutting the length is easy. You flip the board over and score with a razor a few times and you can crack it over your knee and it breaks off very nicely. But to get around curves you have to use a jigsaw but it cuts really easily. I did make some mistakes like measuring from the wrong end and cutting but you have to allow for some learning curve when you're doing something you haven't done in a while. After the main floor was set I reused some metal end protectors that were on the original floor to protect and hide the ends of the wood at the doors. It turned out very nice. Then at the edge between the cab and the floor I got a piece of
aluminum angle and placed it to cover up the edges of the wood . It turned out nice. Some of the corners around the wheel wells I left a little gap but those will be covered up with a wheel well box on the passenger side and the electrical stuff on the drivers side.  Here is a link to a time lapse video of the install. Floor Install

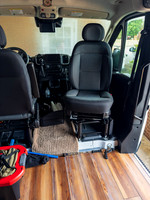
One other thing I installed was a swivel for the passenger seat. That way when you're camping you can turn the seat around and have another chair in the camper area of the van. It was fairly easy to install. I had to disconnect the battery. (because of airbags) Remove the seat. Put the swivel on the seat pedestal and install the seat on top of the swivel. Then hook up the battery. It was fairly easy and took a hour or so to do and it works great. It does raise the seat about an inch but if you don't know about it you won't notice it. Pretty happy with the install.

The next step in the van conversion is the assembly of the cabinets and the galley and the finishing of them. I bought unfinished ones that I can put together and finish. So until then Get out and Shoot!

Hey if you want to check out some more of my photography go to my instagram account Max Stansell Photography there are over 2000 post there. Here is the link

 Max Stansell Photography Instagram Link


New Year's day Shoot #390

January 09, 2026  •  Leave a Comment

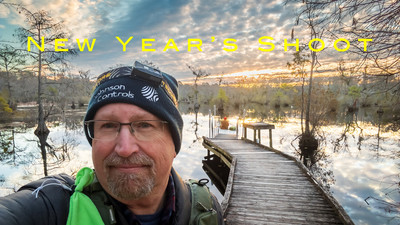
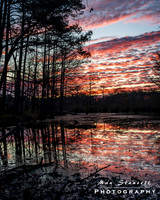
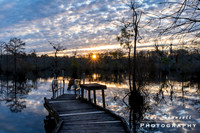
Hey Everyone! Hope you've had a great New Year so far. This week I want to talk about a tradition that I and my photography wingman Robert have been doing the last 6 years or so.  It's to capture the first light of the new year. Each year we try to capture something different from the highest point on the east coat (Mount Mitchell) to the coat at Carolina Beach. We attempted a shoot from the rooftop of a hotel in Charlotte NC but the weather really got us there. But each year we go out and shoot something different. This year was no different. We were planning to go to Florida to shoot Saint Augustine but that plan kind of fell through so this year we decided to stay fairly local and shoot first light through a swamp.  Living in eastern North Carolina finding a swamp is very easy as they are very abundant. But which one. We decided to go to a state park that we had visited before a few years ago. Merchants Millpond State Park in the north eastern part of the North Carolina.

Merchants Millpond State Park- From where we live to the park is about a 2 1/2 hour drive so we had to leave early. So we planned a departure for 4 AM. Kind of early even for me. Now I really haven't shot anything lately but a Christmas parade I had to get my gear ready for the shoot. You know format SD cards, Charge batteries, Clean gear. It also has been kind of cold the last couple of weeks and (Max doesn't like to get cold) so I packed up some cold weather gear to include insulated coveralls, gloves , neck gator, and some electric hand warmers and stocking cap. So we met at Roberts house and headed out into the darkness.  GPS set and on our way. When driving in the dark everything seems to look the same so nothing really to see but we did have lively conversation like always. When driving in this situation we are always on the lookout for deer. I have hit a couple in my travels in years past and we even had a camera club member hit one on the way back from a night shoot on the coast. We saw a few and even had to take some evasive action to miss one of them but we made it to our destination with no problems. When we got there we noticed that the gates were locked keeping us out of the parking lots that we wanted park. They didn't open up until 8am which would be too late for us. So we found a parking spot outside of the park and hiked in. Hiking in the dark with headlamps on wasn't too bad and neither of us old guys fell down. We found our spot and waited for the sun to show itself. 

The Shoot. To me shooting sunrises is all about the before the sun breaks the horizon and right at the breach so you can get stardust. Of course using a tripod because of the low light in the beginning. But after a while you will have enough light to get the camera off of the tripod.  I brought 3 lenses with me but mostly used the 20-70mm but also used 70-300 and a 16-35mm. We had some cloud cover that when the sun is below the horizon really gives color to the clouds and we had some great reds and oranges in the beginning. After a while we decided to change our position to another location to capture the sun breaking the horizon. Of course there were trees in the horizon so not as prolific as say at the beach shot but still very good. We shot for about an hour or so and then headed out to get some breakfast and on the way home.  All in all it was a great shoot and lots of fun. 

This is a great tradition that Robert and I have started and maybe you should try to start also. It's a great way to start your photography year. Until next week Get out and Shoot!

Hey if you want to check out some more of my photography go to my instagram account Max Stansell Photography there are over 2000 post there. Here is the link

 Max Stansell Photography Instagram Link

Video by Robert O'Sullivan


Adventure Van Progress Roof Work #389

January 02, 2026  •  Leave a Comment

Hey Everyone! Hope you're having a great week! We are in the middle of the holidays as I am writing this blog so lots of activities and holiday stuff is going on.  I  have been working on the van and the Roof work and for now is almost complete. (Solar Panel may be going up later) This part of the build is the scariest for me . The build is going to be done in stages. Stage one Electrical, Stage two bed frame, Stage 3 Roof work, Stage 4 floor, Stage 5 Cabinets , Stage 6 Galley and the last and final stage will be the most fun taking it out and testing. Modifications will go on for ever as I find new products or gadgets that will make things easier. Right now I'm in Stage 3. Roof work. 

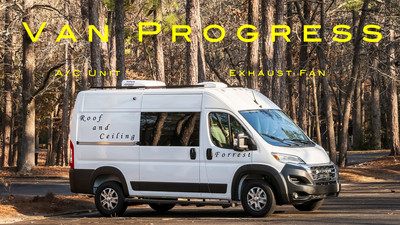
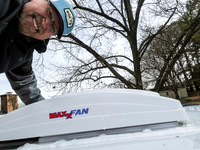
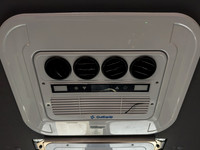
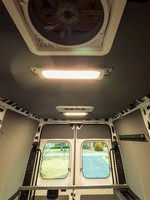
Roof Work entails installing Exhaust Fan and installing Air Conditioning for the back half of the van. When I say back half I mean where the bed, galley and the living area. (camper part) Most everything in the camper part of the van will be 12 volt and run off of battery power separate from the van's main battery for the engine. The scary part about installing the exhaust fan and AC is that I have to cut a hole in the top of my new van. Yikes!!! And I have to get up on top of the van to do it. I needed some help for this portion of the install so my son was my helper. Step one was the Exhaust Fan install. I started with the easiest first. Now I have studied and watched many YouTube videos on how to install the fan so I was pretty confident on the "how to" part of it now was just the "doing" part left. I have been waiting for good weather. Well I must say that the install of the fan went without a hitch and turned out pretty well. After you poke a hole in the roof there is no going back. LOL We were finished in a few hours and the next day I finished all of the insulation reinstall on the inside of the van around the fan and run the power wires to the fuse panel it turned out great. Next was the AC unit. It is much heaver than the exhaust fan and help was definitely needed in getting this unit on the roof. But as before being well prepared and having everything ready was the key. I had to do some prep work on the AC before it went in . It comes with a external electrical cord that I would have to put another hole in the van which I didn't want to do so I rerouted the power through the return duct in the same hole as the AC unit and it worked out great. Then the big question will it fit under my carport! The total hight of the Van empty is 9 foot 2 inches to the top of the AC unit. The clearance of my carport is 9 foot and 3ish inches. It just made the clearance. But this is the tallest the van will be with gear and all loaded down the van will squat a little giving me even more clearance. But it's close when empty. LOL The next day I did all of the inside work. Routing and securing the power cord , Re-insulating the roof around the AC. Then there was re installing the ceiling . To do this I had to cut holes that match where the holes were for the new AC and exhaust fan. To do this I made a cardboard template with the hole in it and transferred that to the ceiling. The ceiling is about 3/8 inch corrugated plastic which is very tough and heavy and awkward to handle. So I made a couple of braces to hold it up as I secured it to the roof of the van. After some struggling I got the ceiling in place and secured it. Then there was just the trim pieces on the AC and the Exhaust Fan to go back in. 

It actually turned out better than I thought and I am very pleased and glad that I am through with this phase of the build which I consider the most difficult and scary. If everything goes as well as this part did I should have no problems meeting my Spring deadline of having this van complete and ready for adventure. The next phase will be the floor installation. Until then wish me luck! And Get out and Shoot!

Hey if you want to check out my photography go to my instagram account Max Stansell Photography there are over 2000 posts there. Here is the link

 Max Stansell Photography Instagram Link


End of Year things Photographers Should do. #388

December 26, 2025  •  2 Comments

Hey Everyone! Hope you're having a great Holiday season. It's the end of the year and there are certain things I think that every Photographer should do to end this year and begin the next year on the right foot. Now I'm a very organized person and this stuff might not apply to you as it does to me. Planning the next years activities and trips is crucial to having a successful year. And reviewing the previous year can help in figuring what went wrong and what went right with projects or trips.  

Reviewing things that went right in your last year project and trips. Did they go as planned? Were the plans you made good did they have enough detail or too much? Was there enough time to complete? Was it fun? Because most of all Photography and the things we do with it should be fun! Thats why we do it. Take a good honest look at how your year went. Did you get good winners? Last year I had a couple of good winners but not as many as years past. Why? Maybe it was the subjects I was shooting. Maybe I wasn't as inspired. Maybe I just wasn't holding my tongue right. There could be many reasons but be honest and figure it out so you do better next year. Start planning for next year by setting up projects and trips. I hope to have my Van finished by spring and taking it out on trips with my wife and Forrest the wonder dog is a definite thing I will do. Taking some small maybe week or so trips and then maybe a larger one out west that would be cool!  I want to finish my Small Towns project that I started this year but for some reason or another didn't finish. So that can be a weekly small trips. I'm looking at doing maybe a small bike packing trip also that will produce some photography or at least a good video. I think bike riding and video kind of go hand in hand. Then there is the photography Club stuff that I will be doing. As one of the officers of the club I tend to get volunteered to do some sort of presentation or two during the year. Then there is this blog that keeps me thinking and writing about photography.  Last but not least there is my Film Photography that I am still working on. I had this on last year's list and still didn't do anything.  This year I want to concentrate on medium format photography with my Bronica ETR SI 645 film camera that I have. So I have lots to do and plan for this year.

Some other maintenance things that I think photographers should do. First I think that you should check the Firmware updates on all of the camera equipment that you have. From Camera Bodies to Lenses and even some flash heads you can check and maybe upgrade the firmware.  Another maintenance item to do is to change the copyright year on the metadata on your camera if your are doing it in camera or in software like Lightroom. This is easy to do but also easy to forget. So at the first of the year make sure you change the year. What about updating your inventory of your camera equipment? Keeping this up to date and sent to your insurance company can be critical if you break something but it's not on the list of items you insured. So it's a great time to do an inventory not only for insurance reasons but maybe you have some stuff that you don't need anymore and can sell or maybe you have some stuff to upgrade. The biggest item I need to upgrade is my Laptop. Although I use a MacMini desktop computer for most of my editing stuff my laptop is almost obsolete because of age and not being able to keep up with newer operating systems and software. I have been using an iPad for mobile editing and it works good but I may need a newer laptop to run Photography meetings and it would be much easer on trips than my iPad. So that's one thing I'm thinking about upgrading this year. I'm down to a couple of models of MacBooks but haven't decided yet but I'm sure it won't be long before I'm writing a blog about my new MacBook.

Well I have rambled on enough. The point of all of this is to plan your year and get ready so all you have to do is start shooting. The less you have to figure out the more energy you can put towards your photography. So until next week Get out and Shoot!

Hey if you want to check out some more of my photography go to my instagram account Max Stansell Photography there are over 2000 post there. Here is the link

 Max Stansell Photography Instagram Link


Van Progress a Few Weeks In #386

December 19, 2025  •  Leave a Comment

Hey Y'all! How's it going? Me? It's been a very busy couple of weeks. I've had my van a couple of weeks and I have been busy planning and buying stuff for the van. It's a lot to consider and with all the black Friday deals out there I'm trying to maximize savings on things I need to get for the van. Originally I was going to have someone else do all of the work for the van which would be great but it would be a minimum of 25,000 dollars and that didn't include things like electric, air conditioning , exhaust fan or fridge. So after adding all of the things together it would be almost 40 grand. So I figured I could do all of that myself. The hardest thing would be the walls and ceiling which were already provided in the van I bought. But it is quite a process figuring what to get and how to do different things . I'm estimating that I will spend about 8,000 dollars give or take to do my build that will make it much like the 40,000 that I was going to pay for. Of course there is no Labor charges and I'm feeling it a little bit in my old bones but if I take my time I will have a great van with all the things I need in it. I have experience in construction and Electrical and Mechanics so I'm pretty good at making things functional but am not very good in making things pretty.  So progress so far...

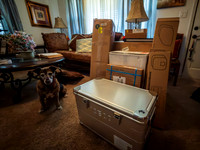
Purchasing items. I have been very busy buying things for the Van which means a lot of research before I pull the trigger. I will be purchasing things for the van and the only thing that I will be fabricating from scratch is the bed platform and a shelf above the bed. All of the cabinets and things I will purchase and install. I'm not much of a carpenter. LOL! So I have purchased the roof mounted (OutEquip) air conditioning unit that is a 12 volt DC unit. Lots of research there but I pulled the trigger. Also on the exhaust fan for the van which was an easy choice of a MaxAir Fan. These will be the scariest part of my build because I will have to cut holes in the roof of my new van to install. Ouch! Other things purchased is the electrical system for the living area of the van. Everything will be 12 volt from Fridge, AC, Exhaust Fan, Lights. They all will be run off of a Mobile Power station that will supply DC voltage( battery power) and AC voltage (like in your house). The Power Station will be recharged by the alternator (car while driving) and a Solar Panel mounted on the roof. I have purchased everything except the Solar panel . I am waiting for the things on the roof to be mounted (air conditioner and exhaust fan) before I order to make sure of measurements of the solar panel. I have also gotten my internet figured out while on the road while getting a Starlink satellite antenna that I can use while on the road to stay in touch with family and you folks. I'll probably do a separate blog on that item itself. I also purchased the things to build a bed frame that will hold a full size bed.

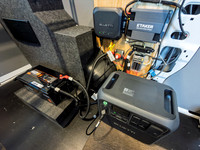
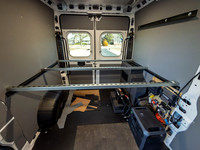
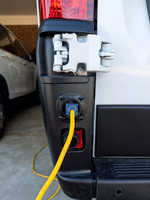
Building Progress. The bed frame has been built out of angle iron and uni-strut . Attached to the main supports of the van with bolts and Riv-nuts attached to the supports with a special tool. I also have the support for the shelf I will make using the same technique as the bed frame. I have also installed all of the electrical onto a 1/4 inch piece of Oak plywood to custom fit around the wheel well of the van. I've installed a Solar/Alternator charger which I have run the wire to the alternator to supply power while driving. That will hook up to the Bluetti AC200L that I am going to use as my power station to charge. I have also installed two buss bars one Negative and one Positive which will hook to a Fuse panel that I will hook the different Items Lights and things like exhaust fan and AC. I have a device that will hook to my Bluetti (Charging Station) and take a 48volt DC output to 12 volt output at 400wats and 30 amps which will hook to the buss bars to supply 12 volt power to the fuse panel. I have also got a larger lithium battery to extend my Charging station's capacity by a lot. I have also installed a shore power plug so I can plug the van into house 115 voltage and charge that way also. So when all done I'll be able to charge from 115 volt AC , the vans alternator and solar power. The weather here in NC has been unseasonably cold the last few weeks so that has hindered my progress a little but I still have lots of time to go. The spring time line is still a go! Whoop Whoop!

Other things like floor mats and little stuff like that I have been adding to the cabin of my van to make it more comfortable to drive. I still don't have 1000 miles on it yet still getting used to it. And of course getting permanent tags on it was a plus. I hate those temporary paper tags that they put on your vehicle. It just screams look at me I'm new. I once had my tires sliced on a new car with paper tags on at a Pizza Hut and I believe it was just because of the tags. So I'm making progress. Next step is the roof and installing the AC and exhaust fan. Wish me luck! Until Next week get out and Shoot!

Hey if you want to check out my photography go to my instagram account Max Stansell Photography there are over 2000 posts there. Here is the link

 Max Stansell Photography Instagram Link


Subscribe
RSS
Archive
January February March April May June July August (4) September (4) October (5) November (4) December (3)
January (5) February (4) March April (2) May (1) June July August September October November (3) December (2)
January February March April May June July August (1) September (1) October (1) November (1) December (1)
January (1) February March April May June July August September October (3) November (2) December