Back to the Future #416

July 10, 2026  •  Leave a Comment

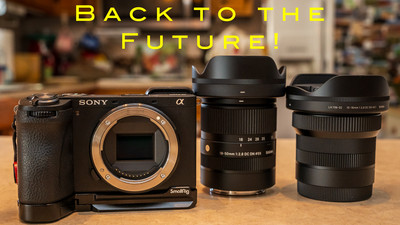
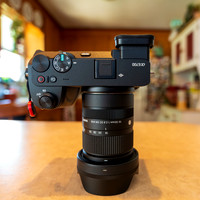
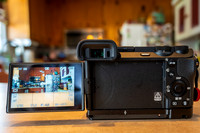
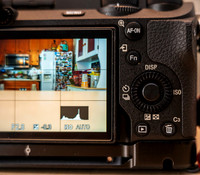
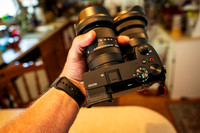
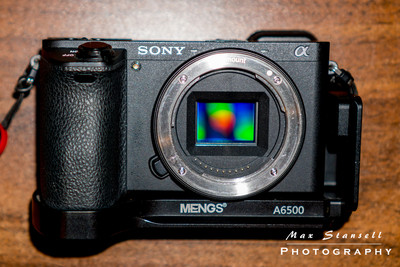
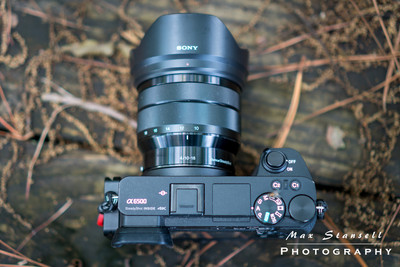
What's up Everyone? I hope that you have had a great week! Me? Not too bad . Thanks for asking. This week's topic is Back to the Future. No not the movie with the flux capacitor. It's about photography. My photography to be more exact. I have gone through many camera's in my photography journey. Now I have preached buying used and stick to your budget .  I have also been looking for a new set up for quite a while. I have thought about Fujifilm cameras, Olympus cameras and all sorts. I have been looking at smaller setups. Especially for travel. I really like my Full Frame set up but carrying around big bulky lenses and camera bodies has worn me down and I have been yearning for my smaller crop sensor set ups that I used to have with all of my small Sony cameras that I've used in the past. Especially while traveling in the MAV (Max's Adventure Van) where space is priority having a small capable kit is what I'm looking for again. I initially went to the Sony A6000 series camera's many years ago because I was doing a lot of backpacking and luging a full frame camera and lenses was not an option. I fell in love with the little camera's and got rid of my Nikon Full frame setup and went full on Sony. I started with the Sony A6000 and after a while upgraded to the Sony A6300 and finally went to the Sony A6500 which I shot for many years. I really love the size of these cameras and they much reminds me of the film cameras of years past , size wise. The Sony A6700 came out a few years ago and I really had my eye on it but opted for the Full Frame Sony A7III. A full frame used powerhouse that I have been using for a while. So after going back and forth after getting my van finished I decided to make the move and get the Sony A6700. It is a much more modern camera than the A7III with modern menu, touch screen, and AI focusing . It has a 26 megapixel sensor just a little bit bigger than my full frame and it has a much updated processor. It is Sony's flagship crop sensor camera. If that's a thing and it has lots of high quality video specs that I'm really not going to use but can do all of that too.  It has been out for a couple of years so I did have the choice to buy used but after researching it was only about 100 dollars difference so I decided to buy new. Yes I bought a new camera. Not used!. So I've gone back to crop sensor with futuristic specs. So Back to the Future.

One reason I went with Sony instead of Fuji the next contender was the lenses. All of my current lenses that I own for my full frame will work with this camera. So my Sony Zeiss lens will work with the new crop sensor body. You do have to add the crop factor of 1.5 and the 35mm will be a 50mm. So I had lots of lenses. The other reason is that I'm used to the ergonomics of the Sony crop sensor cameras. They are designed much like a range finder type of camera but are not rangefinders. The viewfinder is on the left side of the camera and not the middle of the camera. This model has a rear wheel and a front wheel to adjust different things like aperture and shutter speed. So I really like the ergonomics of the camera. I really like the size of the small size of the crop sensor lenses. I have purchased 2 crop sensor lenses which I will talk about in another blog post but the size of these lenses are tiny compared to full frame lenses of the same effective focal length. My new kit lens set up consist of a 10-18mm zoom , a 18-50mm zoom and a 70-300mm. Which will give me a full frame equivalent reach of 15mm to 450mm in a small kit I can carry in a small sling bag. I am really pleased with this new kit and am roaring to get out and shoot. So "hold on Marty" as the Doc would say "it's going to be a wild ride. Back to the Future" Until next week Get out and Shoot! 

Hey if you want to check out my photography go to my instagram account Max Stansell Photography there are over 2000 posts there. Here is the link

 Max Stansell Photography Instagram Link


Wet and Wild West Virginia! #415

July 03, 2026  •  2 Comments

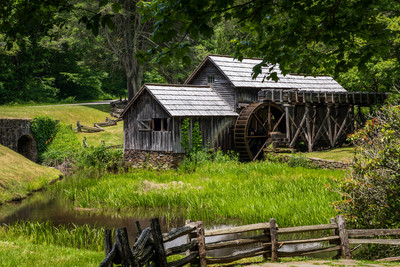
Hey Y'all ! Hope you're having a great week! Me? Pretty good . I just got back from a trip to West Virginia with my wife and Forrest the Wonder Dog in the MAV.  If you haven't been to West Virginia you should put it on your places to go. There is lots to see especially in the New River Gorge area. That was our focus while on this trip. I have been to this area a couple of times in the past but in the fall when the leaves were changing I had never been in the Springtime. My wife had never been in this area before and of course Forrest the Wonder Dog was just wondering why we took him away from his home.  I decided to make a stop in Virginia on the Blue Ridge Parkway on the way there then we were scheduled to stay at a campground on the Parkway. We stopped at Mabry Mill on the Blue Ridge Parkway in Virginia. We took some photo's and enjoyed our stop. Then we went to Rocky Knob campground only about 15 mile away and had a great stay at this beautiful campground. The next morning we headed out to West Virginia.

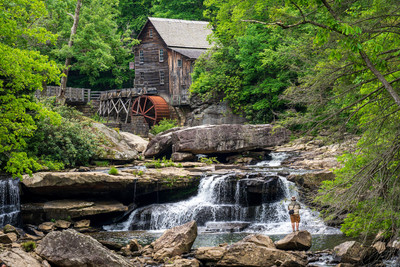
In West Virginia Babcock State Park was going to be our basecamp. We would stay here and travel to all of the destinations around the New River Gorge National Park. Babcock state park has lots of trails , a lake, cabins, camping and of course maybe one of the most photogenic Grist Mill in America . Especially in the Fall. I have been here a few times before but only in the Autumn. This would be my first Springtime shoot of the mill. The mill didn't disappoint and it was as beautiful as always. 

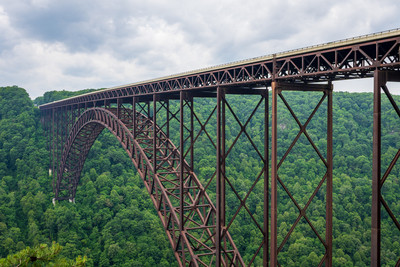
The New River Gorge National park is a rather large park being 53 mile in length. It is the Newest National park. It boast all kinds of activities from white water rafting, hiking, rock climbing. It has waterfalls , abandoned mill towns and of course the New River Gorge Bridge. The building of this bridge saved commuters 45 minuets of travel just to get across the New River Gorge. You now can travel that Gorge in about a minute .

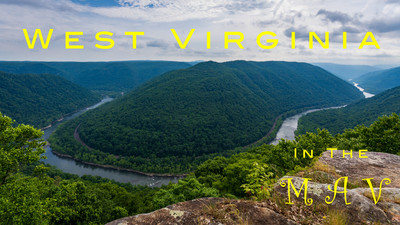
Bridge Day. This day was concentrated pretty close to the New River Gorge Bridge. This is a big bridge sitting over 800 feet above the New River. One of the largest Arched Bridges in the world. They have a festival each year Bridge day and people bungie off of the bridge and base jump off of the bridge. First we went to the Grandview overlook. This over look is over a horse shoe bend in the New River. It is very spectacular view one that my photography club has done sunrise shots over the horse shoe turn in the river. We did not do a sunrise shot as we slept late and didn't get to the overlook until after 10 in the morning. We then went to Turkey Spur over look. We did not climb all the way to the top of the lookout but did get some shots at the base of it. We then headed to the Canyon Rim Visitors center near Fayetteville to see the bridge up close.  We arrived and I got my stamp in my National Park Passport. The Passport is a book that you can get a stamp at each of the 63 national parks. I've only got a few but hope to get many more. Just outside the visitors center is one of the best places to view the bridge. A short walk to an overlook gets you the first good view of the bridge. If you would like to have a different view you can go down the 150 steps to another view. But just remember you have to climb up those 150 steps.  We did both views and decided to have some lunch. What's nice about having the van is that i've got all the stuff for a good lunch right there and we made some sandwiches and were planning our next move. We had a hike planned but we saw that some weather was coming in and decided against it. Good thing we did it started to rain.

This is the wet part of our trip. We had rain and storms for almost 24 hours. The MAV worked great for this time in the rain. We were comfortable, dry had food and I had the Starlink set up and we had internet so we could watch movies, youtube , Facebook or whatever else we could do with the internet. If it got hot we could crank up the AC for a little bit to knock the temp down. So a big win for the MAV. We had to move our itinerary around and decided that we decided to go to Hawks Nest State park in the afternoon. So we went there and had a good time at the overlook and the gift shop there. By the time we were done there we really didn't have much time left so we headed back to the campsite. 

All in all we had a good time in West Virginia . Although we didn't get to do all of the things that we had planned it was still a successful trip and am looking forward to our next trip. So until the next trip. Get out and Shoot!  Here is a link to a short video I made of our trip. Wet and Wild West Virginia

Hey if you want to check out my photography go to my instagram account Max Stansell Photography there are over 2000 posts there. Here is the link

 Max Stansell Photography Instagram Link


How to make your Travel Photography Photo's Not Boring #414 Part 2

June 26, 2026  •  Leave a Comment

Hey Ya'll! How's your week going? Mine? Pretty well. This week's blog is a continuation of last week's blog which you can see by going to this link. How to make your travel Photography not boring. Part 1  This week I want to start off by talking about how our brains plays tricks on us . What I mean to say is that when we see a scene that is very complicated our brains tune out all the clutter . Maybe it zooms into the subject but when we take a photograph the camera sees everything warts and all. And the photo doesn't look anything like what we thought we saw. So when you get home and look at the photo's they have that boring "blah" look to them. So here's another tip.

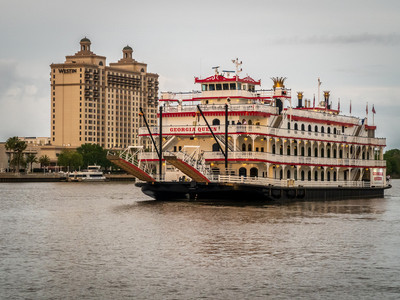
When you take a photo when you're out and about ask yourself two Georgia Queen PaddleboatGeorgia Queen Paddleboat questions. Look at the back of your camera and ... Question 1.  Is there something that I can add to make this photo stronger? Was I zoomed in too tight? Do I need to move to a different position to make the photo stronger? And Question 2. Is there something that I can remove to make the photo look cleaner? Do I need to zoom in with my lens or my legs to cut out something that is distracting?  Do I need to move to a different point of view to make the photo look less cluttered. By doing this you are training your brain to look at the scene like a photographer and soon you will be taking better photos.  Now say you got your photo. Maybe it was of a statue in a square the next thing you should do is take a wider angel photo to include the surrounding scenery.  Then take a detailed photo of something in the area. Maybe just one section of the statue. Now you have 3 photo's that tell a story. You have the subject , the surrounding area and some detail of the area. You have a story.

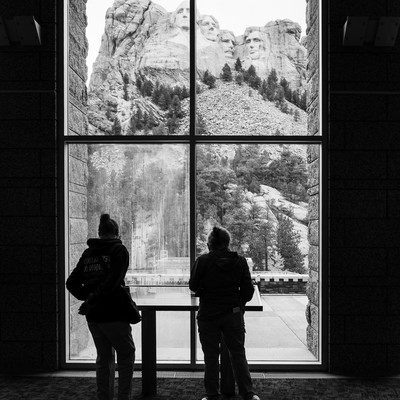
Mount Rushmore PeopleMount Rushmore People If you're like me when you get to a new spot to shoot when traveling you want to take out your camera and just shoot, shoot, shoot.  I understand but I think you should just look around first. Scope out the place and decide where a good photo would come from. When I get out and shoot , shoot , shoot I never use those photo's because they are usually not the best point of view to capture the best shot of what I'm looking at. Enjoy your travels and be in the moment and then shoot , shoot, shoot. You'll get better photo's.  I like to shoot Raw + JPEG. If I shoot just RAW let's say I shot 500 photo's. A lot of those photo's won't be used but if I were just showing to my family the whole set of JPEG's which are already processed is a easy way to share with family and friends and if I have a photo that I really want to edit then I have the RAW for that.

Don't just chase the big touristy instagram shots. Sure get those shots but look around for more everyday normal stuff. Say you're in Japan and a temple is the big shot but just the every day stuff that the local people are doing. Maybe a local is cleaning the street in front of their storefront. Something you don't see in America that can be very interesting and compelling shot that might be more interesting than the big shot that you were looking to get.  These types of shots seem to tell a better story than the touristy one.

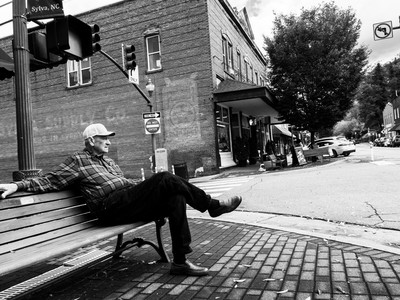
Give yourself a project to shoot while you're traveling. It could be almost anything. Shoot circles, or colors or maybe vending machines. These Man in Sylva NCMan in Sylva NC little photo projects while you're out and about are not only fun but they will help you see details that you normally wouldn't see because you were not looking for something you were just trying to get to the next instagram touristy place. You will be surprised of the types of photo's you'll find along the way and while searching you might find that trip winner.

 When you get home from your trip try to print some of your photo's. They don't have to be anything special or expensive. I call them my shoebox photos. I usually send some of my winners from each trip to Walgreens or Walmart and get 4x6 or 5x7's made of my winners. It's fun to frame these little photos and put them around your house and its fun for people to look and explore when they come to your house. When my wife has new people over I like to be like a fly on the wall and watch people start looking at the photo's. They are like what is this or where is this at. My wife will tell them that I took these photo's at whatever place it was. It's nice to see other people look at your photo's for the first time we don't usually get that privilege because most of our viewers are online.

Well we had to get to it let's talk about gear. When I first started shooting travel I had to have all the lenses with me and I thought it made me feel like a real photographer but really it made me feel like a pack mule when I went on photo walks . Now I try to travel with one body and two lenses. Not only does this make me a better photographer because I'm not tired from carrying around a heavy load it makes decisions easier. I'm not changing lenses all of the time. I'm carrying a standard zoom (24-70 full frame equivalent ) and a longer zoom a 70-200 full frame equivalent would be fine. If I need a super wide lens I take out my phone for the shot CherokeeCherokee or I do a panorama with my standard zoom lens. The standard zoom lens stays on 90% of the time keeping dust off of my sensor. I have a CPL filter to enhance Landscapes and to cut down on reflections. And that's about what I actually carry when I'm out and about walking around.  Other things I'll bring  are a battery charger to charge batteries at night. A tripod only if you think you will need one. Maybe a tabletop or a Platapod . I also have ND (Neutral Density) filters for slowing shutter down. These are things I only carry if I know I might need them otherwise they stay in the car or hotel room. If you're an Apple user I use air tags in all of my camera bags to make sure I don't forget anything leave behind or if something was stolen I can track them.  Spare SD cards . I try to have a different  one for each day of my trip.

For shooting modes I'm usually in Aperture Priority but manual works well also. Whatever you're comfortable with. Shoot even if you have to shoot in Program mode it lets you get the shot. Shoot in Shutter priority to slow down the shutter for artsy photos. If you have image stabilization either in camera or lens I would keep it on. One tip is when shooting a slower shutter shoot in burst. The first one might be blurry because of pushing the shutter button but the second should be sharper.

My last big tip is if you're traveling with family. Get up early and do a photowalk somewhere while your family is still sleeping. They are never as interested in your photography as you are and would much rather sleep in than go with you out early. You can practice different techniques and may even get that winner. They will say when did you get that shot? And you'll say " while you were sleeping" LOL Well that's about it for some tips for travel photography. I hope this has helped you and you quit getting those boring travel photo's. Until Next week "Get out and Shoot!"

Hey if you want to check out my photography go to my instagram account Max Stansell Photography there are over 2000 posts there. Here is the link

 Max Stansell Photography Instagram Link


How to make your Travel Photography Photo's Not Boring #413 Part 1

June 19, 2026  •  Leave a Comment

Hey Ya'll! Hope you're having a great week! Me? Pretty well. It's springtime and hopefully you're out on a Photography trip. I love taking trips and doing travel photography. When you're there you love taking photo's of what you see. You get so excited during capture but when you get home and you look at your photo's they look kind of "blah" and not interesting? They never seem to show what you experienced while you were there taking photo's. You think maybe it's the gear or my technique or something because these photo's just look boring. In this blog I'm going to give you some tips on how to make your travel photography photo's not look boring. This blog might slip into a few blogs so hold on. LOL

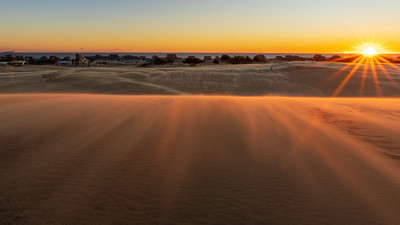
So you're on vacation and you go to a popular place and there are people everywhere. How do you get an interesting photo? Here are a few tips. 2025 Sunrise Jockeys Ridge2025 Sunrise Jockeys Ridge First of all is the timing. Try not to go when everyone else is going. Let's look at National parks for an example. If you get up and go early there won't be as many people. A lot of folks that are on vacation won't roll out of the hotel until after 9 or 10 but if you get there at sunrise or a little after you will be surprised on how you have the place to yourself. Timing is everything when going to popular spots and if you don't want a lot of people in your shot go when they aren't there. Don't shoot with a wide lens. Lets say your taking a photo of a famous building if you use a wide angle lens and there are people in front of you it will make them look very big and take away from the shot you're trying to get. Use a longer lens and backup the people will be smaller and your building will look bigger. Another option is don't fight the crowd. They are part of the experience of the place so try to include them in an interesting manner. A crowded New York street is suppose to have lots of people so show them in your shot. Try using a slower shutter speed and have the people kind of blur while your subject stays still this will show the hustle and bustle of the scene and can make a great photo.

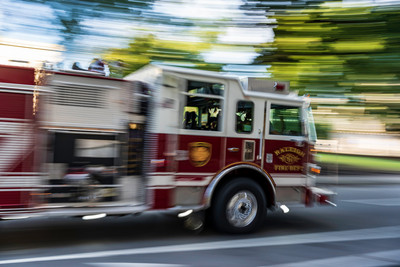
Fire Truck BlurFire Truck Blur So lets say you're out taking photo's of lets say San Francisco you want to get a good cable car shot you take one and it just looks boring. Almost like any type of photography to make it interesting try using Layers. Look for a good background to put behind your subject . Move around and get the best one you can get then there is the foreground . Try to put something in the foreground maybe people, flowers almost anything will work and make your shot more interesting. Try framing your shot in trees or through a window of some kind. All of these things will make a boring shot look a whole lot better. Once again I say don't use a wide angle lens unless you have an interesting background. If you are shooting outside you will have a lot of sky make sure it's interesting before you put so much in your photo. Remember most good photo's have foreground, subject and a background.

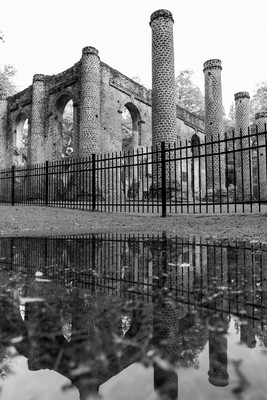
Now when you're traveling you try to control everything but one thing you can't control is the weather.  Seems like whenever I travel with Robert Sheldon Church Ruin ReflectionSheldon Church Ruin Reflection my photography wingman it always rains. You have to learn to go with it . If you get outside and take some photo's in the rain you will find some interesting shots that a lot of people won't. First of all if it's an overcast day don't use a wide angle lens. You'll end up with a big white sky that nobody wants to see. So use a little bit longer focal length to crop out most of the sky. Secondly look for things that you can only find in rainy conditions. Like umbrellas. If you're in a big city and people are walking to and from the subway they will have some umbrellas use that in your composition maybe even have some long shutter shots to spice it up a bit. And of course in the rain there are puddles to get reflection in. Get your camera as close to the puddle and shoot. Night time is great for this with lights of buildings really reflect well. Make sure you protect your camera. If it's weather proofed that's great but if it isn't don't let that hold you back. A plastic bag will work wonders and if you use common sense you will be able to use your camera with no problems. I use a shower cap to help protect my camera body and lens if the lens isn't too big and it works great. Just use common sense when shooting in the rain.

Well it looks like I have typed enough for one blog so I will continue this topic next week. So until then " Get outside and Shoot!"

Hey if you want to check out my photography go to my instagram account Max Stansell Photography there are over 2000 posts there. Here is the link

 Max Stansell Photography Instagram Link


The Camera that 90% of Photographers Need #412

June 12, 2026  •  Leave a Comment

Hey Everyone! Hope you're having a great week. As Photographers either Amateur or Professional we are overwhelmed with ads and videos from camera companies telling us what we should have in our camera kit. I can't blame them because I have given in to those adds and spent lots of money. But did it improve my photography? Not really. All of the fancy gizmos and gadgets haven't really improved my photography at all. They tell you that you need full frame this, and megapixels that, and that you're not a photographer unless you can shoot at 30 frames per second. Now if you're a professional sports photographer or portrait or wildlife photographer that are selling your photographs you might. But the mass majority of us are taking travel or street or just taking photo's of the kids at a soccer match don't need a lot of the camera that the companies are trying to sell you. If you are just posting to facebook or instagram or occasionally printing something for your house you really don't need the fanciest of cameras. Let's go over the specs of what I think 90% of people need in a camera. 

Sensor size- I have had full frame and crop sensor camera's for years. Most of the time I shot with Crop Sensor cameras. Most of the photo's on this website were shot on crop sensor camera's. It is true that the dynamic range of a photo is better with a larger sensor but to the necked eye you can't tell unless you magnify 100% or more and people just don't look at photo's that way. Crop sensor camera's have many advantages first of all they give a field of view that is deeper than full frame. What that means is more of your photo is in focus which most of us want for landscapes or ordinary shots. They are smaller which means that the lenses are smaller and cheaper making them more portable. Great for street or travel. Most people don't need Full Frame Sensor only about 10% of photographers. Full frame is better in low light so if you're a astro photographer a full frame would be better but lots of great photo's have been taken with APSC crop sensor cameras. Crop sensor camera's are cheaper than full frame camera's so they are great on the wallet.

Megapixels. Now you can get camera's up to 100 megapixels. Does the ordinary photographer need this? No. Megapixels give you what is called resolution. Everyone knows that 4K is great for viewing on video or on a screen. Well 4k comes out to 8 megapixels on a camera. So anything bigger than 8 will give you a 4k photo or better. I think the magic sweet spot is between 20-40 megapixels anything smaller you have trouble cropping any and anything larger just takes up a lot of space on your hard drive. Most of my camera's have been in the 20-24 megapixel range and my full frame camera that I use now is only 24. The larger megapixels cameras are good for cropping like you would do in wildlife photography. If you're not printing bill board size and mainly posting to facebook or instagram you don't need the extra megapixels .

Frames Per Second. This is short and simple . Unless you're a sports photographer or a wildlife photographer Frames per second really doesn't matter. Most camera's will shoot 8 to 10 frames per second and that is fine for 90% of photographers.

Lenses. There are so many lenses to choose from when buying and you don't need the most expensive or the most popular. Most people can get by with a kit lens that came with your camera. The kit lens is the lens that comes with the camera when you buy it. It came with the kit. The kit lenses that come with camera's now are really good lenses and can be all you need for most of your needs.

Camera. Now let's talk about cameras. Camera's come in different levels . You have the entry level which is the cheapest , intermediate and the professional. Most folks don't need the professional. Only if you are a professional. The entry level or intermediate level is where most people need to buy. My camera's fall in this category and don't think I ever had a professional camera if I did it was many years old that I bought used. Which I think is a good way to go if you're serious about photography. All the manufacturers have these types of camera's and you must research which one fits your needs. A professional camera can cost up to 6000 dollars for body only. You can get an entry level or intermediate for 2000 or less and that includes the lens. Although both may seem expensive if you are serious about photography 2000 isn't expensive when you get a lens also. These are new prices you can get even less if you buy used. So I think that 90% of folks need an entry or intermediate camera and lens combo. It will take very good photo's especially if you are only posting to facebook or instagram. So until next week "Get out and Shoot!"

Hey if you want to check out my photography go to my instagram account Max Stansell Photography there are over 2000 posts there. Here is the link

 Max Stansell Photography Instagram Link


Subscribe
RSS
Archive
January February March April May June July August (4) September (4) October (5) November (4) December (3)
January (5) February (4) March April (2) May (1) June July August September October November (3) December (2)
January February March April May June July August (1) September (1) October (1) November (1) December (1)
January (1) February March April May June July August September October (3) November (2) December