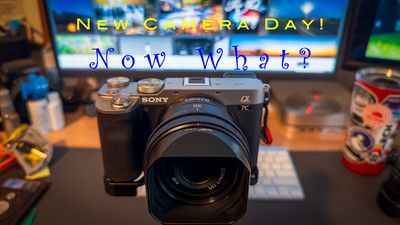
New Camera Day! Now What? #373

September 12, 2025  •  Leave a Comment

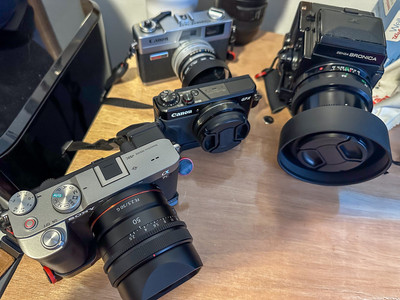
What's up guys? Me ? Great! I know you've seen the title and no I didn't get a new camera . I haven't broken my new year's resolution but I have thought about it. LOL Next year might be an expensive year! But a new member of our club was getting a new camera and I thought about what things would I do if (and when) I get a new camera. So that is what this blog is about. Now getting a new camera is a big deal . They are expensive and a big investment and to us camera geeks it's personal also. We all love our cameras and this chunk of metal is almost like family . So just like family we should protect it and take care of it. So lets get to it what to do right after getting your new camera.

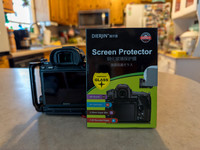
Protect it. Protecting your expensive investment is key to a happy and enjoyable relationship with your camera . One of the first things I do is get a screen protector for the LCD display. Just like your phone a screen protector really gives you ease of mind when handling your camera. I purchase used gear and I do the same thing no matter if it's new or used. I once bought a used camera from a friend and got a great deal on it but it had a big scratch on the LCD and if they had protected it that wouldn't have been there and they probably could have got more money for it than what they charged me. I am a big body cap guy if I don't have a lens on it to protect the sensor. After you get your camera I would also make sure that you add it to your insurance policy to make sure that it is insured incase of an accident. I've had to use my insurance twice with broken lenses and it saved me lots of money. You can usually add this to a home owners insurance policy if you own a house or some sort of insurance like the one with PPA (professional photographers association)  A must have for your expensive purchase.

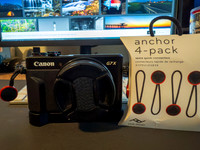
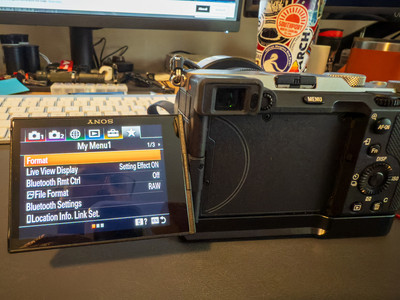
Use it. Things that I do when I first get a camera is to get it set up to me.  With all of the menus and items that you can change this becomes daunting. I usually find a YouTube video on setting up my particular camera and they go through all of the settings of your camera. I like back button focus so I always make sure that is setup. I also get my camera set up with a strap of some sort. I'm a big peak design guy so all I have to do is put some of those buttons that they use to connect the strap on my camera. Then I can put a neck strap or a wrist strap very easily. I also get extra batteries . At least one so I can change out if I have too. I also get an external battery charger. All of these items if they don't  come with your camera you can get off of Amazon. Then it's just practice, Practice ,practice . If you have just bought the same brand of camera the setting knobs and levers  are probably in the same spot but if not practice changing setting so you can do it without looking. Nothing is more frustrating than fumbling with settings trying to get a shot.

Getting a new camera is great! But it can be an overwhelming task to learn it with all of the technical things that new camera's do. I would suggest watching some youtube videos or some sort of tutorial that you can watch over and over again until you understand how it works and what settings will work best for you. I'm sure some folks have other things that they do when they get a new camera please share. Until next week . Get out and Shoot!

Hey if you want to check out my photography go to my instagram account Max Stansell Photography there are over 2000 posts there. Here is the link

 Max Stansell Photography Instagram Link


Photo Accessories you might want #371

September 05, 2025  •  Leave a Comment

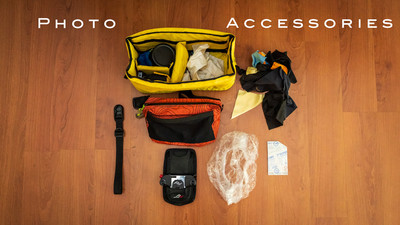
Hey Everyone! Hope ya'll are having a great week. Me ? Not too bad but I've been in a photography and blog writing slump and need to snap out of it. My camera club is having a meeting and the topic is "show and tell", where you bring some sort of photography item in and talk about it . Maybe a filter or a bag (not a camera ) but some sort of accessory and I thought it would make a good blog. I may have done this before but I'm still going to write about it because the way to get out of a writing slump is to write. Now there are millions of photography accessories and you can spend a lot of money on , but these are going to be the ones that I like and use. You may have some of the same or different that you like and use. Some may be a little pricy but most are very cheap and things you may already have laying around. Now some of these may sound weird but I think they can be helpful.

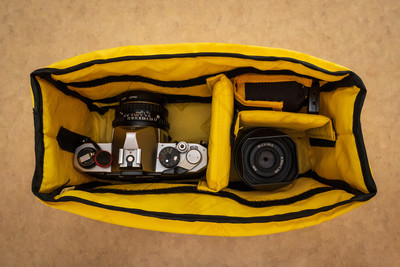
Bags- There are all kinds of dedicated camera bags out there but most of them say, " look I have a very expensive camera kit in here steal me. " What I like to do is take every day bags and make them camera bags. Now I'm mostly a street/travel photographer and most of my cameras and lenses are small this might not work if you're a wildlife photographer with big cameras and lenses. But I use a camera insert cube that has a few compartments that can be arranged for camera/lens and extra lens. I can put it in a normal backpack and I have an inconspicuous bag with my camera kit in it I can put it in a computer bag and I have a computer bag with a camera in it.  I even have a large lumbar pack that I call "my purse" that I can stick it into and I have an over the shoulder bag.  They are great and only cost 20 bucks or so. People that go out with me know I love to wear a fanny pack. Yes a fanny pack.  I think they are great I can put my phone in a little pouch and it's very handy and not pulling my pants down if I had in my back or front pants pocket. I can keep small lenses in there or filters and don't even have to carry a camera bag and still have everything right there.

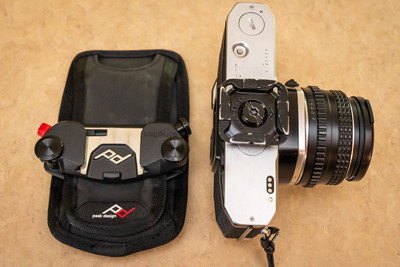
Peak Design Products- Peak Design is a great company that started making straps and have expanded into all sorts of products. I love there straps they are made out of the seat belt material and are flexible and strong. They have little buttons that go on your camera and the straps can easily be put on or taken off. I got my first one years ago when they were just starting out on go fund me page. They also make clips that go on your backpack that will hold your camera secure. I have one on all of my backpacks. They are great you can clip your camera on them and you are hands free and if a shot appears you can quickly take the camera off of the clip and shoot. Straps go anywhere from 40 to 60 bucks and the clips are at 80. Well worth the money they last forever. Peak design makes bags, tripods , and all sorts of accessories now and if they are as good as the clips and the straps they will be awesome. All I have are the straps and the clips.

Cleaning Cloths- Micro fiber is the way to go and you don't have to spend a lot of money on them . You probably already have lots of them around the house. Seems like any small device you purchase for anything comes with one. I have gobs of them. I put one in every compartment of my camera bags so I always have one handy. I always carry one in my pocket. They are great for glasses but they are great to lend also because when you're on a photography trip the person next to you always needs one. I try to keep the bright colored ones in my pocket so I can see them and they don't blend in with my pockets or anywhere I lay them down. And of course there are all types of brushes and blowers you can get to keep things clean. A clean camera is a happy camera.

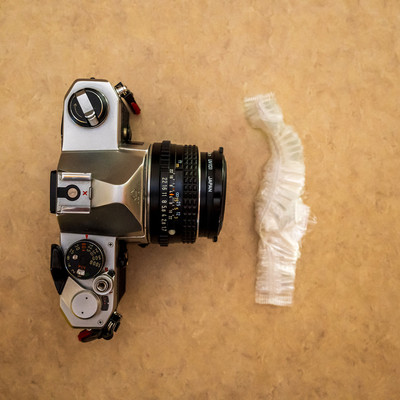
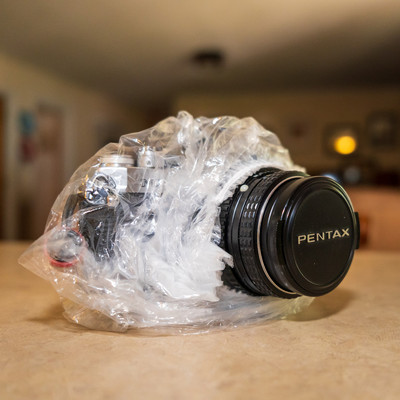
Keeping things dry- Camera's are expensive electronics and they don't like water. I know lots of cameras are water resistant but I feel safer keeping them dry. When I'm out and about I use a cheap shower cap to put over my camera and lens if I get caught in a downpour. They are cheap and small and tuck into your camera bag very nicely. And what about in your camera bag or storage case. I use desiccant . All of those little pouches that you get in shoes and electronic boxes that say "do not eat" are free and you can just chunk into your bag . If your bag get damp they will absorb all of the moisture and not let get into your gear. They go in every pouch of my camera bags along with the micro fiber cloths.

Other items to think about. This is something I started a few years ago is to put an Apple air tag on all of my bags. When traveling this is especially good for piece of mind. Knowing where your gear is at all times. How about insurance for your gear? Although not an accessory it will give you comfort in knowing that if something happens to your gear you are not totally out of a camera. You can usually put this on your home owners insurance .  Some small tools like an allen wrench that will fit your adapter plates or L brackets. So as you can see there are all types of gadgets that you can get for your camera kit. But you don't have to break the bank you probably already have lots of the stuff just laying around. Until Next week Get out and Shoot!

Hey if you want to check out my photography go to my instagram account Max Stansell Photography there are over 2000 posts there. Here is the link

 Max Stansell Photography Instagram Link


Best Lenses for Travel Photography #372

August 29, 2025  •  1581 Comments

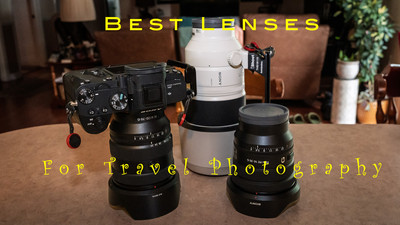
Hey Ya'll! Hope you're having a great week! I'm doing pretty well and want to talk about lenses for travel photography. If you're like me you like to travel and want to get great photo's while you're gone on a trip. But you don't want to take everything you own with you so I thought I would give you a little guide on what lenses to take. Of course the trip will dictate what lenses you take but this will be a good look at lenses you might want to take. When I travel I don't like to take more than 3 lenses if I can get away with it and as in a blog before I sometimes use my phone as a gap lens. Here's the link to that blog . Using phone as a Gap lens

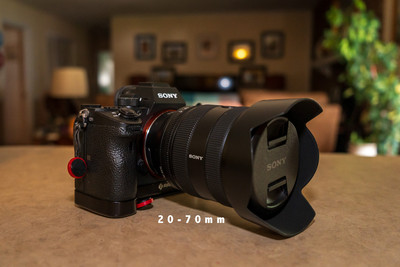
All Purpose lens- A good zoom lens like a 24-70mm lens is a good place to start. It is good for landscapes, portraits and all kinds of stuff. A lot of folks like the f/2.8 max. aperture version but I find that a f/ 4 works great for me . The f/4 max. aperture is cheaper and lighter and works great. I use a 20-70mm version which gives me just a little more on the wider end than the 24. A 24-105/120 mm is also a great choice these usually come in a f/4 but give you a little more reach on the long end of the lens. When I'm out traveling the all purpose lens is on my camera 90% of the time and if I'm on a photo walk I'll only take this lens with me and if I have to go wider my phone is always at my finger tips.

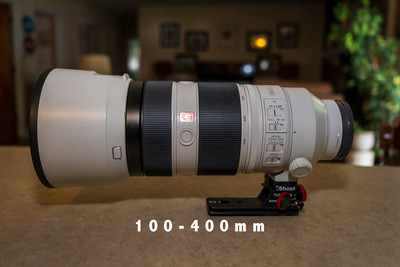
Telephoto lens- Telephoto lenses are great for isolation shots and bringing your subject closer to you. Depending on where you are going a 70-200mm f/4 lens might be the ticket for you. It's a little bulky but not as much as the f/2.8 version which is a tank. I carried the f/2.8 version for a long time before discarding it. If you plan on doing some wildlife then a longer lens will be needed. Maybe a 100-400mm f/4.5-5.6 would be a good choice or even longer at 150-500mm depending on your trip. The lens is considerably more bulky but if wildlife is what you're going for that's what you need. I recently went on a trip to South Dakota and wildlife was a big part of the trip and my 100-400 really came in handy. But if you're not planning on wildlife then a 70-200mm will be plenty.

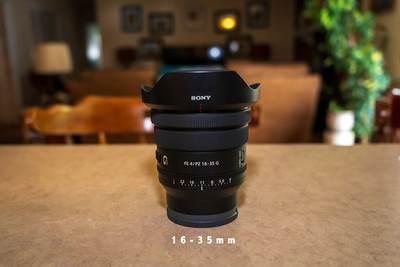
Wide Angle Zooms- If you plan on a lot of landscape photography or shooting in very close quarters in cities a wide angel zoom may be the ticket for you. The standard 16-35mm will give you great shots and plenty wide for environmental portraits. A f/2.8 if you're looking for low light shots but otherwise I would go with f/4 lens . For the obvious reason lighter and cheaper. Depending on the trip this lens sometimes doesn't make it into my bag for the trip.

Prime lenses- These lenses is what I would use for low light . If I'm planning on doing nighttime photography I'll take a 20mm f/1.8 which is plenty bright enough to get the stars in view. Other great lenses are a 50mm and a 35mm both can be had pretty cheaply and with wide apertures of f/1.8 or wider but f/1.8 is plenty for me. They can do great low light and portrait work. A 35mm on your camera can be a great street walk around lens and be nice and compact.

So what would I take? On my recent trip to South Dakota I took 20-70mm f/4, 100-400mm f/4.5-5.6 and a 20mm f/1.8. This trip was a lot of wildlife so the 100-400mm came in handy but was big and bulky but luckily mostly shot from the car so I didn't have to tote it too much. I brought the 20mm just for a nighttime shoot we were planning other than that the 20-70mm stayed on my camera.  If I was doing a mostly landscape trip like I did to Utah a couple of years ago the 16-35mm would replace the 20mm although my 20-70 would be wide enough for most of the shots and if it wasn't the phone would come out to capture it. If I didn't carry the 16-35mm then some sort of prime would be in my bag a 35mm or 50mm for maybe a street walk at night or something. As you can see it really depends on what you plan to shoot but I like keeping my travel kit to 3 lenses maximum. A lot easier to travel with and you don't have to make as many decisions on what lens to use because you only have a couple and you can concentrate on the subject that your shooting not the focal length that you have in your bag that maybe you should change out to. I hope this has helped with deciding  what lenses to take with you when you travel. Until next week. Get out and Shoot!

Hey if you want to check out my photography go to my instagram account Max Stansell Photography there are over 2000 posts there. Here is the link

 Max Stansell Photography Instagram Link


What about Micro four thirds? #363

August 22, 2025  •  Leave a Comment

Hey Y'all! Hope you're having a great day and week! This week I want to extend my blog from last week and ask the question What about Micro four thirds? As you know I have lots of time to research and I have been doing just that looking into the Micro four thirds or M43 sensor sized cameras. Now I don't have any hands on experience with them but would like to and will after the new year comes. I still am in the middle of my new year's resolution of not buying new gear for this year. But when this blog comes out I'm only 6 months from maybe purchasing a M43 camera. Lets go over some of the pro's and cons of these small sensor cameras.

Pro's. Small sensor means greater depth of field. The larger the sensor the smaller the depth of field and since these sensors are half the size of a full frame sensor that means you have more depth of field. That works good for landscape, travel ,macro and general photography. Smaller sensor means smaller lenses. This is a big one for me. With smaller lenses the complete kit is smaller and easier to travel with and carry. Way up on my list. With smaller sensor is lower megapixels . At 24 megapixels or less that means more room on my disc drives and less computing power I will need to do stuff in post production. Smaller sensor also means that it's easier to perform in camera computational photography. M43 cameras are known for being able to use computational photography to expand what the camera shooter can do with the photo's in camera. Things like built in ND grad and Graduated ND filters. M43 cameras use a universal mount so you can use either Panasonic or Olympus or OM Systems lenses on either cameras model. There are lots of tricks these little cameras can do that their big brother sensors can't do because of the size of the sensor.

Cons. Resolution people would say is a con. At 20 megapixels some say that this isn't enough for cropping in post and printing larger photographs. Some say that the small sensor isn't good for portraits because of the large depth of field that these sensors have and creating bokeh isn't as easy as larger sensors. Some folks treat these camera's as toys not serious cameras because of the sensor size. Some say that M43 cameras are a dying breed of camera's because only 2 companies make camera's that use the sensor size.

I'll tell you my opinion that I think that they are alive and well and the people that use M43 cameras are very loyal to the brands they use and the camera manufacture's that they use. I am very interested in purchasing a camera and a couple of lenses to test this format out. I am very interested in the OM System OM-3 and a prime and a standard zoom to play with this format. I want to explore the computational photography things that these cameras will do. We all go through phases in our photography from beginner camera guys, to the bigger is better phase now that I have gone through all of the phases I am looking refine my photography for what I like to take photo's of and am trying to match the equipment to chore. Or the right tool for the job. I personally think that M43 is a very good choice for photography and I plan on checking it out. Until Next week Get out and Shoot!

Hey if you want to check out my photography go to my instagram account Max Stansell Photography there are over 2000 posts there. Here is the link

 Max Stansell Photography Instagram Link


10 Dollar Challenge! #370

August 15, 2025  •  Leave a Comment

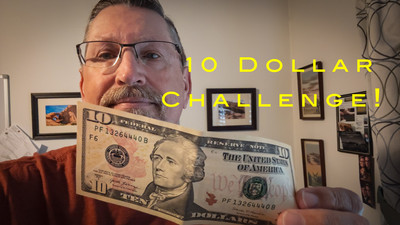
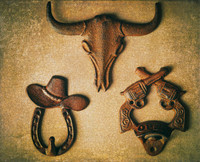
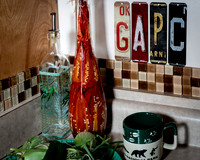
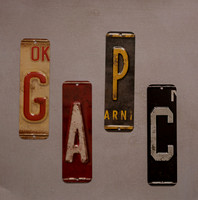
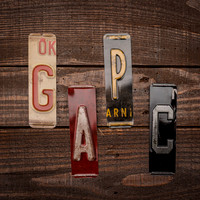
Hey Ya'll! Hope you're having a great week. Me? I've been doing Okay ,Well that's not true I've been in a photographic slump! I have been in it for a while and needed something to snap me out of it. I don't want to buy anything camera related to get me going because I have made the "new years" resolution not to buy any more camera gear this year and I haven't.  But it seems that buying new gear is what I usually do to get me out of the slump so what do I do now? I haven't really touched my big camera since my South Dakota trip I have been using a point and shoot or my iPhone mostly. I met my wingman Robert at McDonals for a cup of coffee. (You know that's what us old guys do) LOL and he come up with a challenge. To go to Hobby Lobby with only a 10 dollar bill and find something to shoot and go home and make some photo's. That's the challenge. The whole goal of this challenge was just get out camera's out and shoot. It doesn't have to be a work of art just something to remind ourselves why we love photography. So we went to Hobby Lobby across the street and started browsing around. It's the beginning of August and they already have Fall pumpkin stuff and Christmas stuff out! Drives me nuts! But anyway we started looking and they have lots of stuff to see and remember the 10 bucks is the limit. Robert found something right away a western themed object. And I was looking for something Bicycle related because I've really been into cycling lately. But I came across some licenses plate letters and my mind started working. I could spell out my name " Max" but that was too short. I could spell out "GAPC ROCKS" (Goldsboro Area Photography Club) but it was too many letters and would put me over the 10 dollar limit. So I settled with just GAPC . So I picked out the letters making sure I had the right ones. I'm not the best speller. LOL I also picked up a gray piece of paper for a background. (I should have gotten another color) After a while we headed to the cash register to pay for our Loot. My total came to 8.59 and Roberts came to 8.87  and I was the winner with the cheapest loot. While I danced a jig Robert hobbled out limping. (He has a bad back and is awaiting surgery) So he limps and twiches every now and then as the pain from his back stabs at him. Can't wait till he gets his surgery and is back to recovery. I feel bad making fun of someone with a disability. (Ha Not really) LOL Well I brought my stuff home and started the Photoshoot portion of the challenge. I thought mine would look good with a Beachy background but didn't really have anything and while I was looking out the Kitchen window I saw where I have a little coffee station where the letters would look good. I had a shadow off of a decorative bottle that sits there and I placed a few Items there and set up the letters . I wanted to have a strong light to make a shadow off of the bottle there and the letters were suppose to be just part of the scene not front and center. I got a LED light and set up a Light stand to put it on and cranked it up where I had a good shadow on the wall of the bottle. I took a few compositions and liked what I came up with. The next shot was to put the letters on the piece of paper that I bought so when I got them to photoshop I could overlay a texture over the letters and make it look cool. For lighting of this shot I used a little flash on TTL(Through the lens metering) and pointed it at the ceiling . I took a few shots like this until I got the exposure that I wanted. The third shot I got was with the letters on some boards that I have to give it a rustic look. I used the same lighting technique as I did with the gray background with a small flash pointed at the ceiling . I pulled all of the photo's into Adobe Lightroom and started editing. For the first shot that I took in the Kitchen I edited it normal and desaturated it just a little bit. For the second one on the sheet of gray paper I took a textured photo and merged it with the photo I took in Photoshop. For the last photo I edited it normal. 

Now are these photo's works of Art ? Mine certainly aren't . But we did achieve our goal of getting our camera's out and taking some photo's. Which neither of us have done lately. It was a fun challenge and one you can do and it only cost 10 bucks. Try it and let me know the results. Until next week get out and shoot! 

Hey if you want to check out my photography go to my instagram account Max Stansell Photography there are over 2000 posts there. Here is the link

 Max Stansell Photography Instagram Link


Subscribe
RSS
Archive
January February March April May June July August (4) September (4) October (5) November (4) December (3)
January (5) February (4) March April (2) May (1) June July August September October November (3) December (2)
January February March April May June July August (1) September (1) October (1) November (1) December (1)
January (1) February March April May June July August September October (3) November (2) December