Groupies! Photography Clubs / Organizations
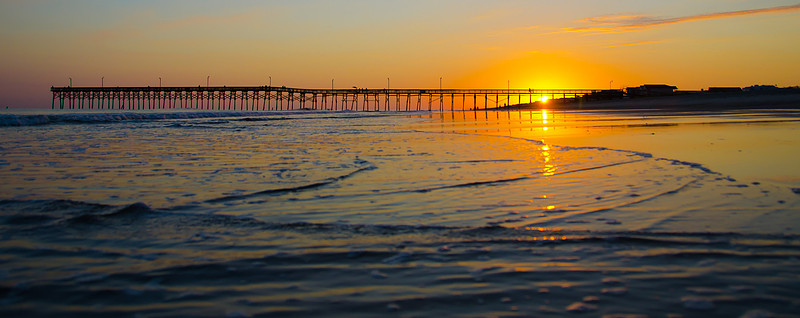
One day I was looking up friends from the past on Facebook and found one of my former Air Force friends and found that he lived in my town and by stalking his profile I found that he was one of the officers of a local photography club. Before that time I had not even thought of a photography club. I immediately contacted him to find out when the next meeting was. When I got to the meeting and started listening to the members talk and interact I was in heaven. These people are talking my talk , they were enthusiastic like I am. I was so pumped up after that first meeting that I'm writing about it now 3 years later. Photography Clubs/Organizations give you a place where you can learn and grow. Before I joined my club most of my growing in photography came from books or the web and trying to copy some technique or image that someone else had done. Most of my photographs were taken at or around my house but after joining I started venturing out more. My club has monthly workshops where we learn a new technique or go to a place to explore and photograph. We learn different types of photography from Portraits, Macro, Wildlife, Landscape. We learn about post processing and HDR (High Dynamic Range). So in short you can expand your photography horizons just by being an active member. The people you meet in a club are from all walks of life and different photographic levels of experience and you can learn something from all of them no matter if they are a beginner or a professional photographer. The photography club gets you out of your comfort zone "photography wise" and puts you into a uncomfortable place where you can grow. My first year in the club during a "Help Portrait" event they let me shoot portraits with studio lights. I was very nervous and had not shot many portraits especially with lights. I really didn't know what I was doing but I kind of faked it and found that I really liked doing portraits and since then I have done everything from family portraits to head shots to a bridal shoot. Everyone in the club is very helpful and is more than willing to show you how or explain something to you. Most of the time they can't wait to tell you how they got the shot or the story behind the shot. And then there is the people you meet! Its great to go shooting with like minded people from all walks of life and the friendships that you make can make are priceless. As a "photography nut" equipment is another part of the process that can be confusing. Like most photographers i have GAS! No not that kind! GAS is (Gear Acquisition Syndrome). The act of trying to have the next best and greatest thing hoping it will give you that great award winning shot. In a club you can try out new lenses or flashes without having to buy them to find out later that you don't like and your stuck with something that you didn't want. So its a great place to learn about new and different equipment. Products like books, prints, Frames are another plus. You learn where the deals are and maybe see things that you haven't even thought of like canvas or metal prints. You may be able to get discounts by being a member of the club at local camera shop. So go out and join your local Photography or Camera Club and expand your Photography horizons! These are examples of the different kinds of photo's that I've taken in or because of workshops that my photography club held. Keep Shooting !
Tools of the Trade "Camera's"
The first system that I use is what I call my “Big Boy Camera” Is a DSLR (Digital Single Lens Reflex) Camera System. This type of system is the “Industry Standard” for modern professional photography. My main camera is the Nikon D800 a 36mp full frame sensor professional camera body. My backup “Big Boy Camera” is Nikon D7000 a 16mp cropped sensor camera body. Both Camera body’s are awesome cameras and I love to use them. I have good “glass” or lenses that I can interchange between both body’s. My favorite all around lens is the Nikon 24-70mm f2.8 lens. It falls mostly in the focal range that I shoot in and is on my camera 99.9 % of the time. I have a Nikon 70-200mm f2.8 which is a great lens for portraits and all around photography. Its a big heavy lens so toting it around for long peroids of time is a chore but a fantastic lens. I have a Nikon 18-35mm f3.5-4.5 lens that I don’t use a lot but is a fairly good lens and is inexpensive. I have a Rokinon 14mm f2.8 for fisheye shots nightscapes etc… This is a very sharp lens its manual focus and inexpensive. For macro photography I have a Nikon 60mm f2.8 macro lens that was inexpensive but very good lens.
This “Big Boy Camera” System is the system that I take to Portrait photo shoots, Landscapes that I’m going directly to like waterfalls , sunrises , sunsets. I also use this to do shoot events like birthday parties, retirement parties and the such. I use it for studio work when I do product or still life work.
The other system that I use is a Mirrorless system. One of the major advantage of this type of system is that its smaller , lighter but still has great quality. It has more bells and whistles than my “Big Boy Camera” and is a real fun camera to shoot with. The system I use is a Sony A6000 a 24mp Crop sensor camera body. I have a Sony18-105mm F4 Lens this is a great walk around lens. I also have the Sony 10-18mm f4 wide angel lens. This is a super lens sharp and gives a great wide perspective and great for Landscapes. I have a kit lens that came with the camera a 16-55mm which is a 35mm equivalent to 25-75mm in my favorite focal range. Another cool thing about this camera is that I can use some of my old film camera lenses and some of my nikon lenses like the macro on this body. When I use these lenses the camera is in full manual mode for some this might be a big deal but I grew up on fully manual cameras so this is really kind of fun.
The mirrorless Camera system is what I use when I do my backpacking because it is lightweight and so versatile . My “Big Boy Camera” with the 24-70mm lens weighs 7 lbs. My Mirrorless camera with the 10-18mm and the 18-105mm Filters and Bag wight 5 lbs. So Hiking I get more bang for my buck. This is a fun camera and fits well in my hand and is my carry around with me everywhere camera. Maybe in a later blog I’ll go over the pro’s and cons between DSLR and Mirrorless systems. Well that about covers my camera systems of course I didn’t talk about strobes or lighting at all and Tripods ! You know I can do a whole blog on just tripods. Maybe later.
I have a couple of other camera’s that I use from time to time. The first one is a point and shoot camera (Lumix) that was converted into a infra-red camera. Infra-red gives a new perspective or should I say look. I’ve but an example of what this little camera can do in this post. Notice how all the greens turn white giving a snowy look. I don’t use this much but when I do Its a real stunning change to a dull scene.
The last camera that I use mainly when Im backpacking is a waterproof point and shoot camera (Fugi XP) that can give a real cool perspective of a waterfall from underwater or very close to the water surface without worrying about the camera getting wet. Well thats about it maybe Ill do some blogs on these unique camera’s.
Keep Shooting!
Tools of the Trade " Filters"Filters are becoming a thing of the past. But for a landscape photographer they are one of his best tools. I am a photographer who started in the film era where there was no "Chimping" or "Photoshop" where things could be corrected after the fact. You had to get it as right as you could "in camera." Most filters nowadays can be duplicated in some sort of editing program like Photoshop or Lightroom. The problem here is the more that you do in post- production, the more the image is damaged. My goal is to get it as good as I can "in camera" and then take it to Photoshop or Lightroom to do final touch up. I consider this to be the best way to get good photographs.
There are all shapes and sizes of filters. They come in round, square, screw mount, and filter holder systems. Filters help the photographer let you see what he sees. When I have unwanted light, like in a sunrise or sunset, I use a graduated neutral density filter to tone down the brighter part of the frame so I can pick up some detail in the foreground. Without the filter you get the foreground under exposed and the background over exposed. So we use filters to trick the camera. There are all types of filters. I mentioned a neutral density filter, but there are many others from polarizers, UV filters, and colored filters. The main filters I use are neutral density filters that darken all or parts of the photo without changing the color. There are different types of neutral density filters -- plain, graduated, soft graduated, and hard graduated. These filters help you take photos when the light is very difficult to get the correct exposure, like with sunrises and sunsets. They can also bring out detail in flat light. The sunset below was taken with a graduated neutral density filter attached to tone down the bright sky and bring out detail in the foreground. Polarizers are the other type of filters I use. Polarizers are like sunglasses for your lens. When you put on a pair of sunglasses, notice how the grass, sky, and things just pop? The same thing happens with this filter. It will take the glare off of water and shiny things. It will also enhance the sky, making it bluer that you normally see it. The polarizer is the only filter that cannot be duplicated in post-production.
I use two different styles of filters -- screw-on filters and ones that require filter holders. My main filter system is made by Lee Filters. I use their filter holders and filters. This type of filter can be very expensive, but it's because they are handmade. Here is a link to a YouTube video of the Lee Filter Factory -- http://www.youtube.com/watch?v=lMu_m203YaY It's very cool to see how they are made. Filters can enhance your photos if you give them a chance.
Keep shooting!!!
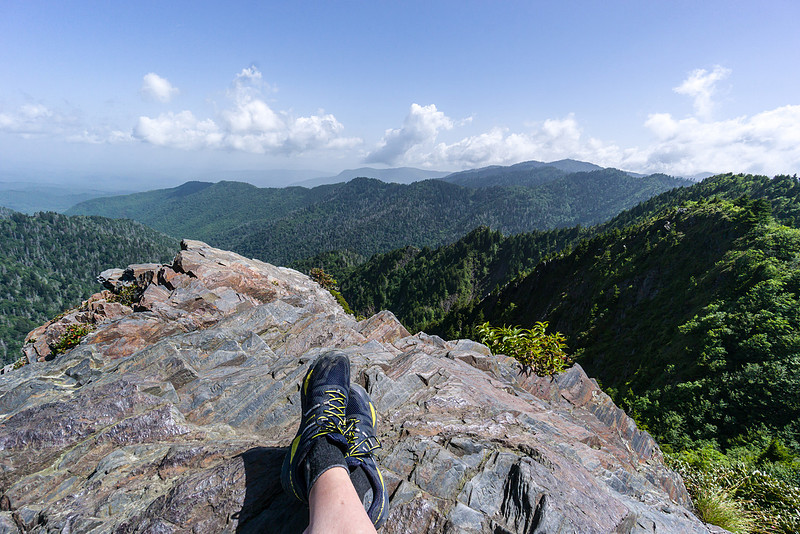
Charlies Bunion Loop Backpacking Trip Video
https://www.youtube.com/watch?v=Uq44VvLWsMw New website and Restored Blog
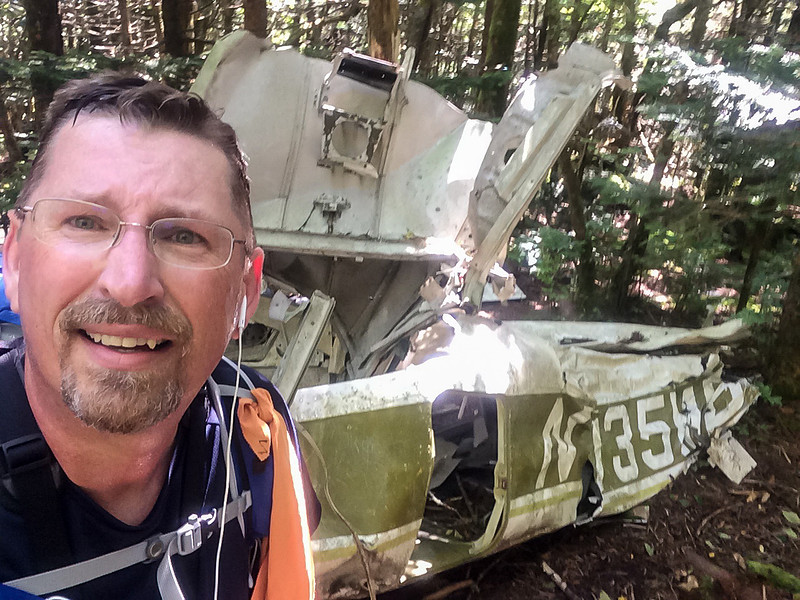
This photograph is of me on top of Grandfather Mountain with the wreckage of a small plane that crashed in 1978. After this photo was taken, while I was hiking on the trail later in the day, I found a guy that didn't quite look like a hiker and started up a conversation with him. I came to find out that he was the son of the pilot who was flying the plane that crashed. I found out that his father had perished in the crash, so I didn't ask too many more questions. He wanted to show some of his relatives the wreckage, but had incorrectly marked the location on his map. I pointed him in the right direction, and hopefully he found his father's plane. Small world, huh?
Newer Posts »
© Max Stansell Photography
|